1968 Gibson Les Paul Prototype - restoration
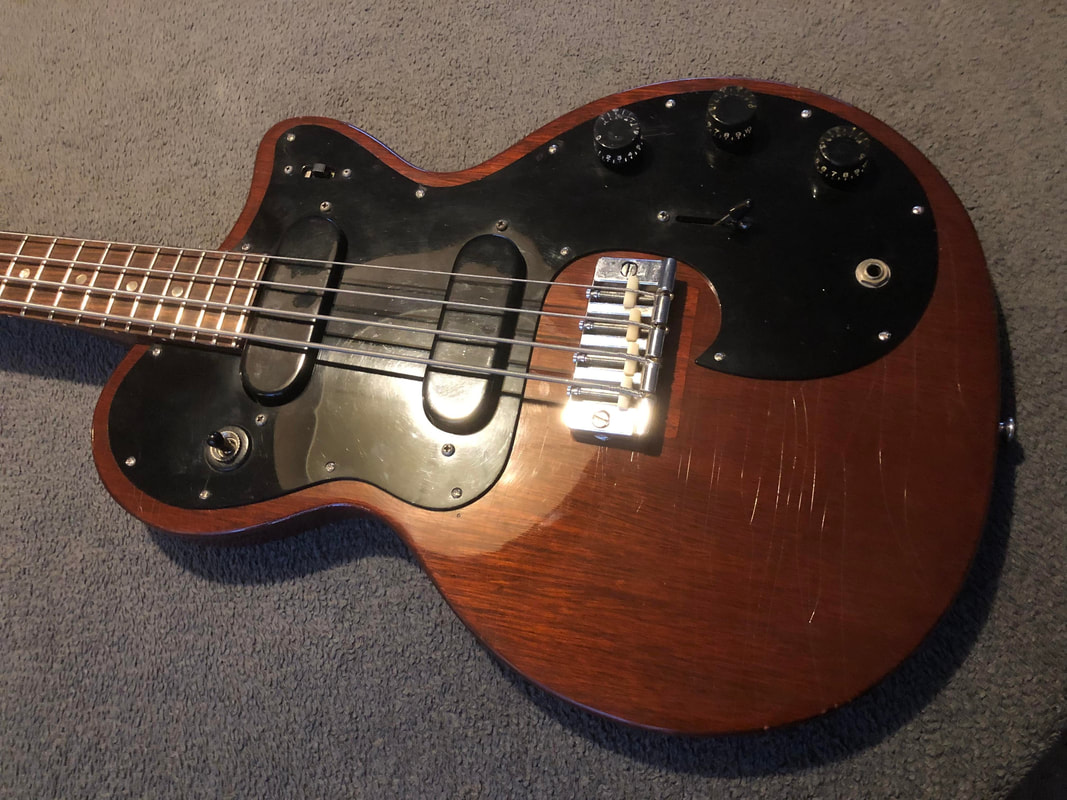
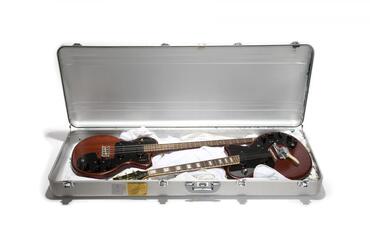
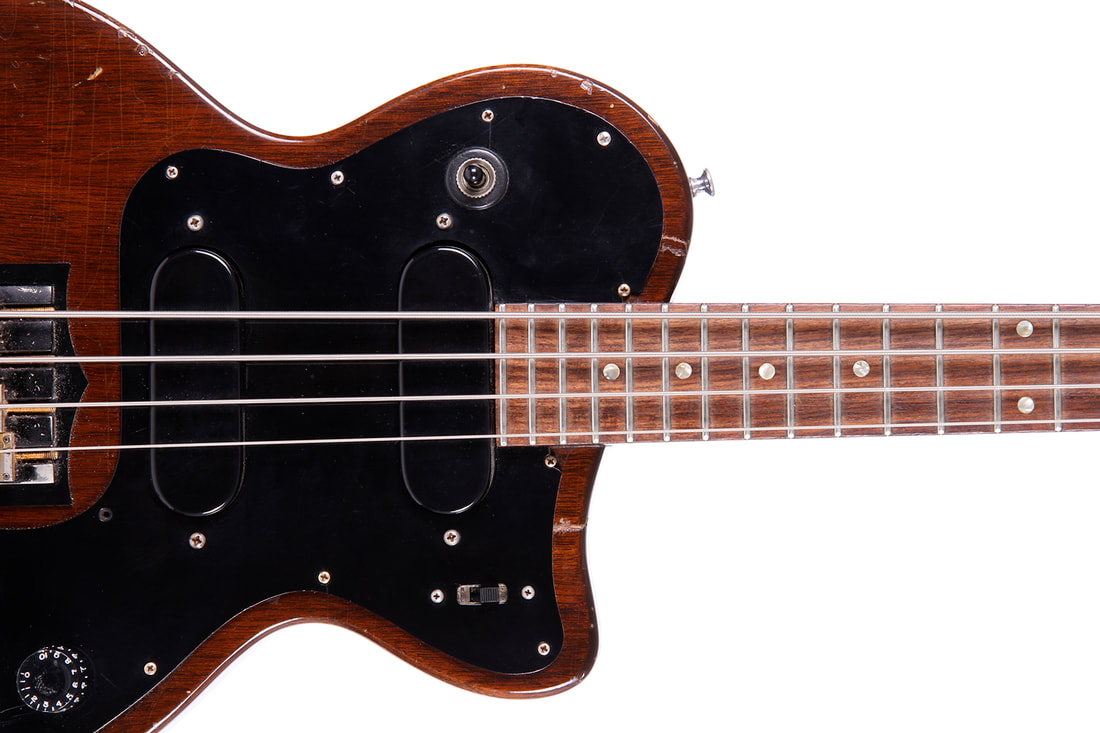
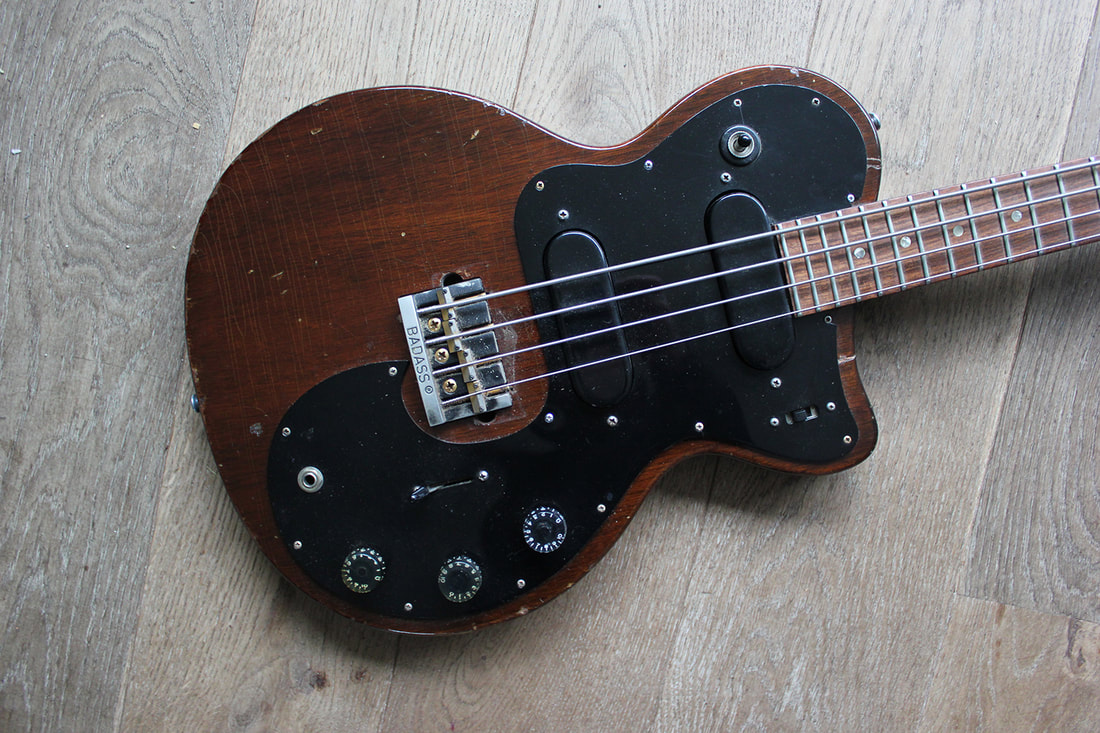
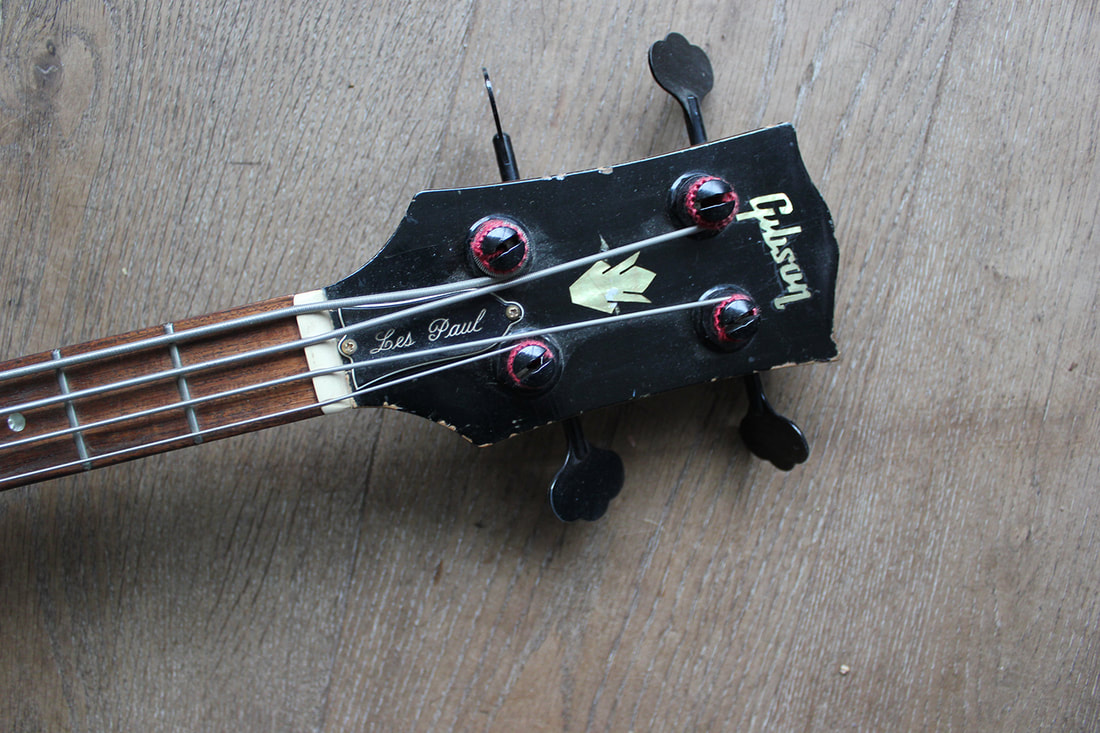
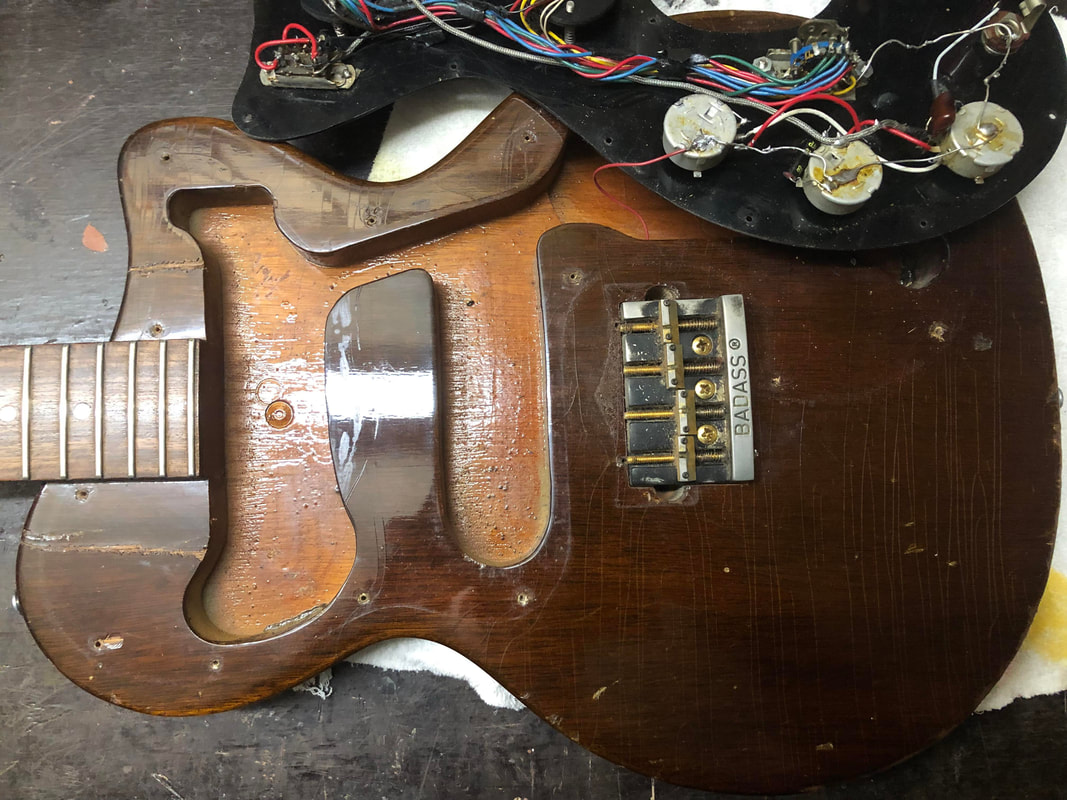
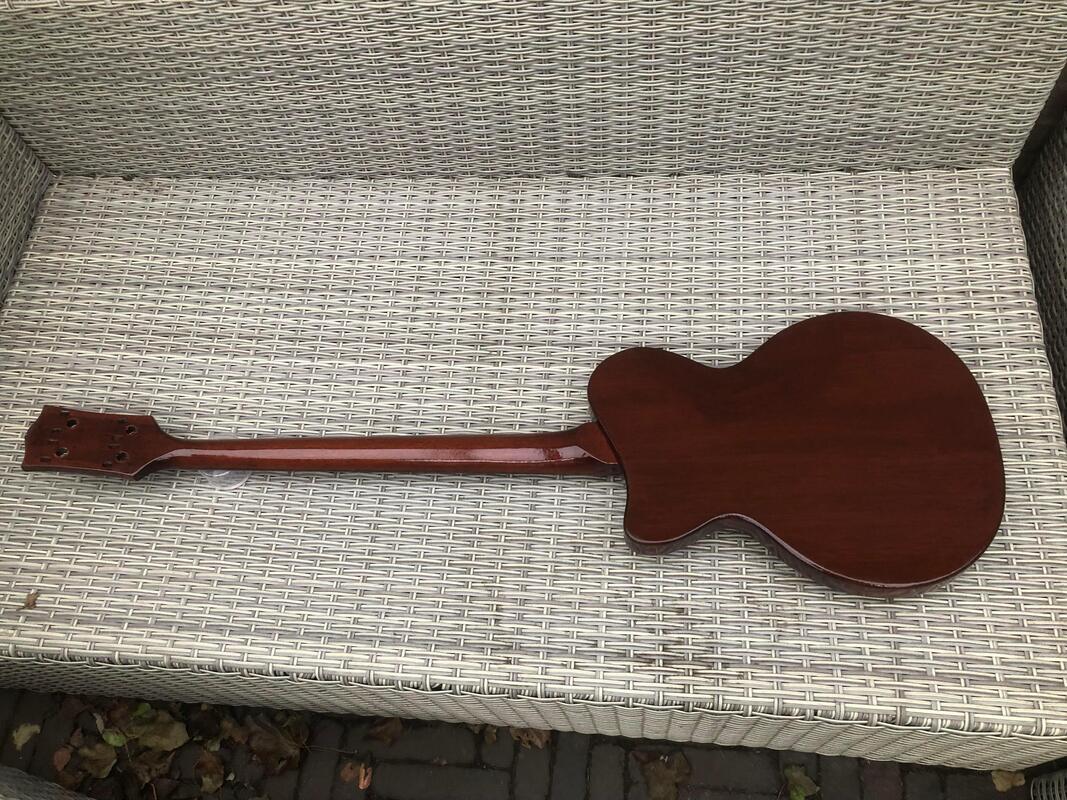
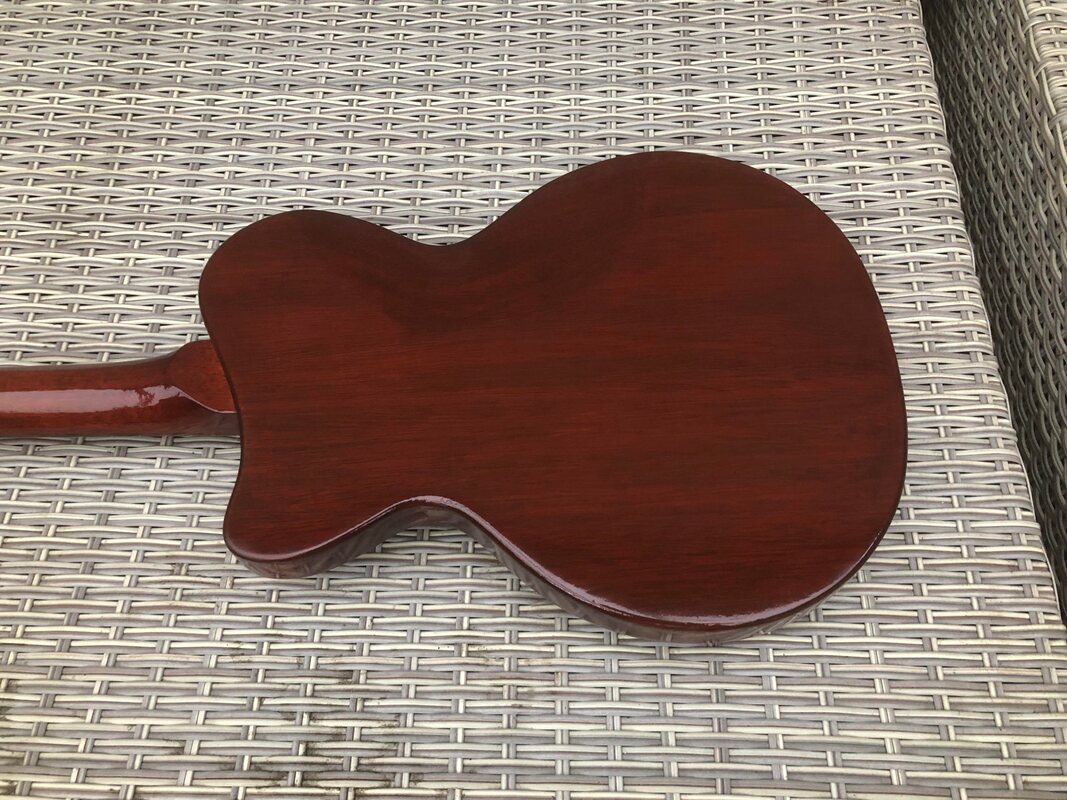
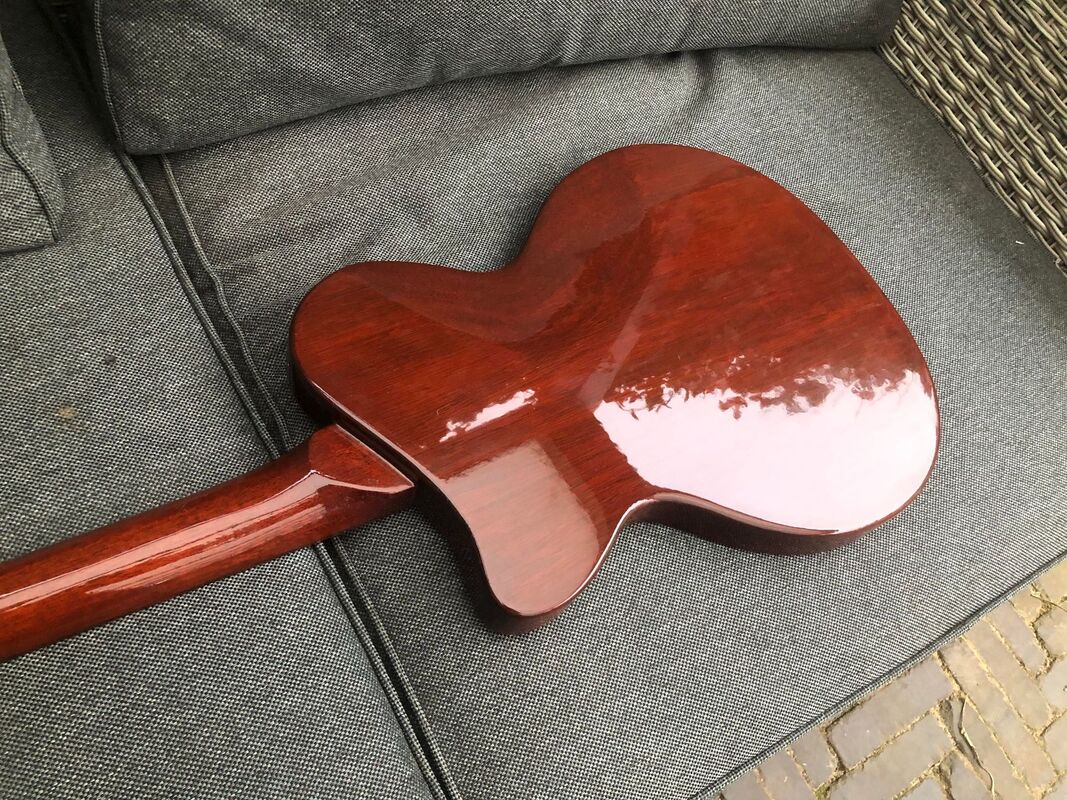
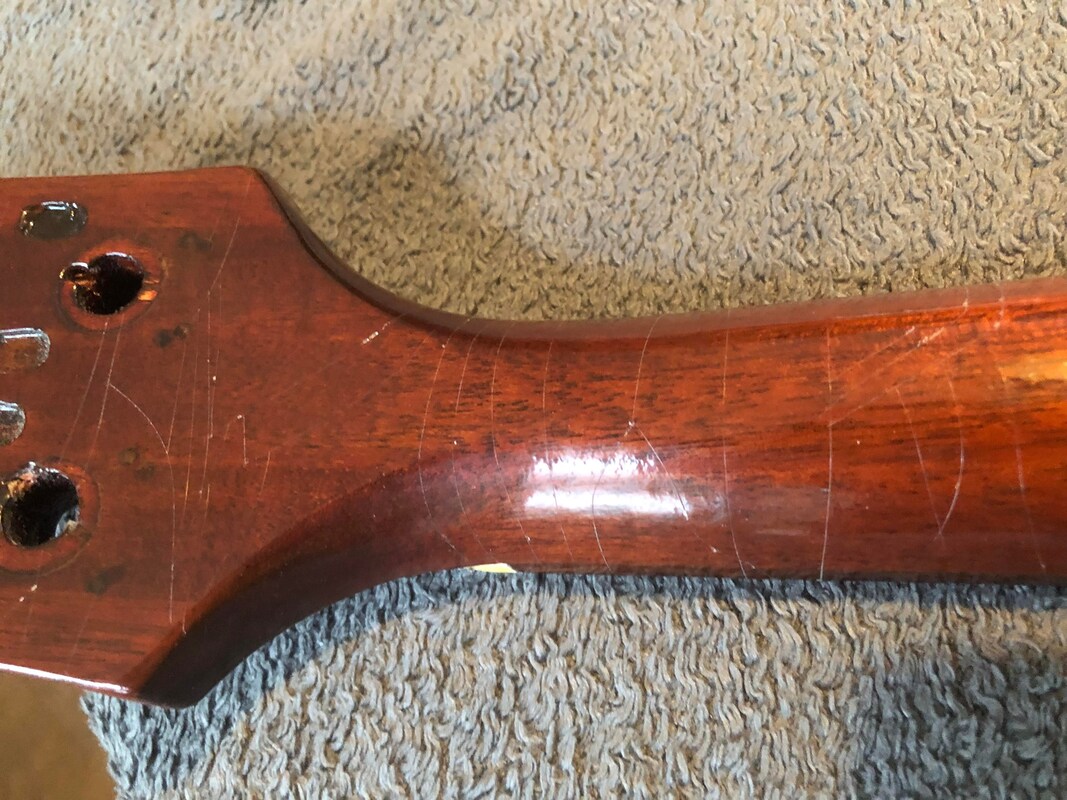
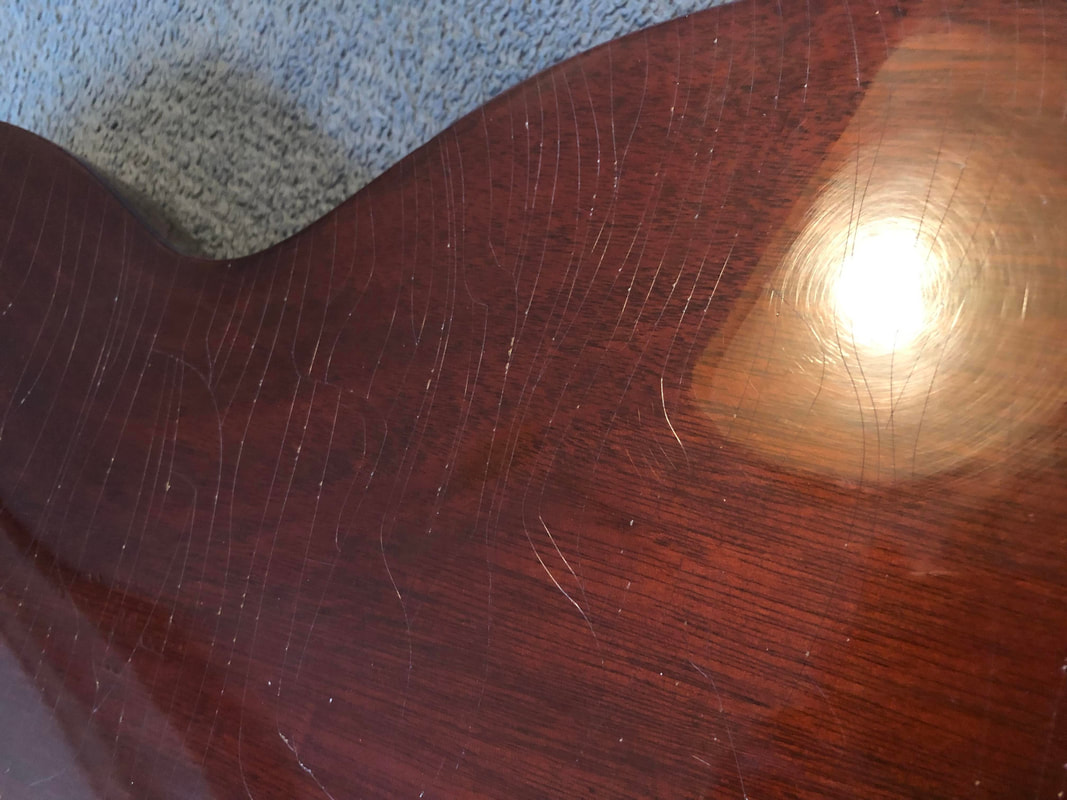
Before the restoration
In 2008 I bought this weird Gibson bass off Ebay via a good friend in Germany. Nowadays I happen to know a thing or two about Gibson bass guitars, but at that time it wasn't exactly clear whether it was either an employee build or an unknown prototype. But it looked legit to me. The way the lacquer had aged, the shape of the headstock, the logo, the neck, the rosewood fretboard and the fretless wonder frets, the electronics. No doubt in my mind it was a real Gibson.
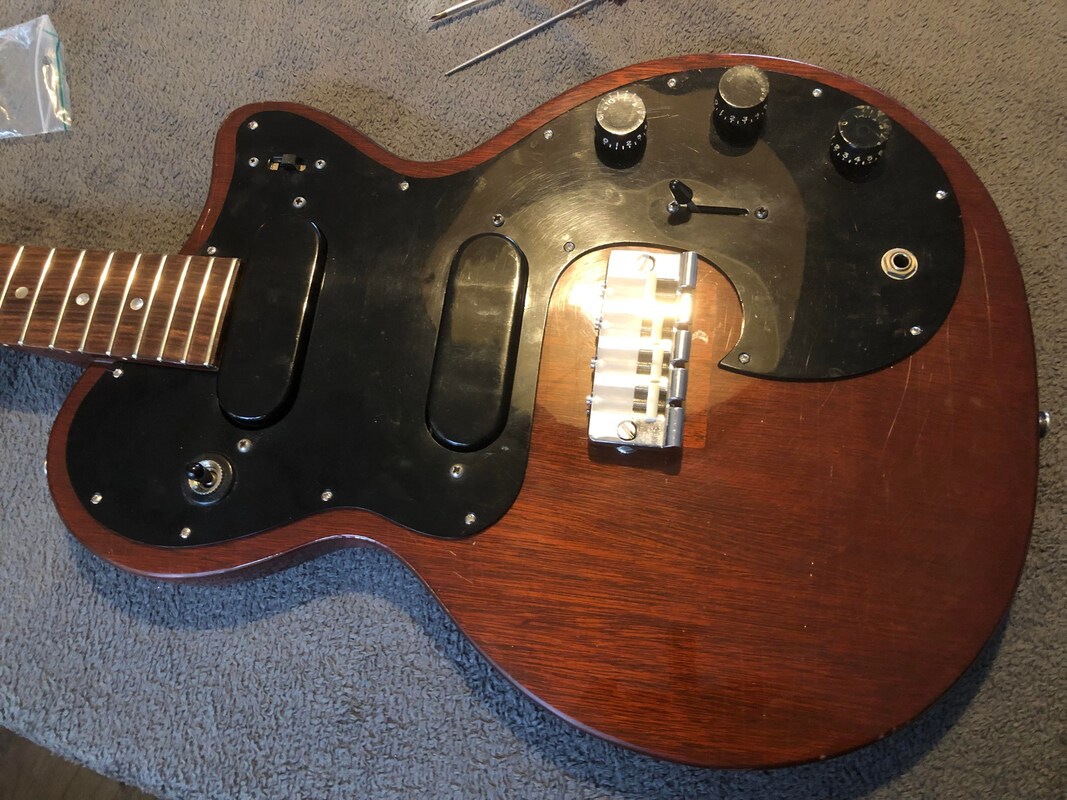
But there were some weird things going on. The serial number had been scratched out and partly filled with some kind of bondo. The bass featured a Badass bridge that was partly recessed into the body. And aftermarket black tuners.
But I bought it anyway.
But I bought it anyway.
|
|
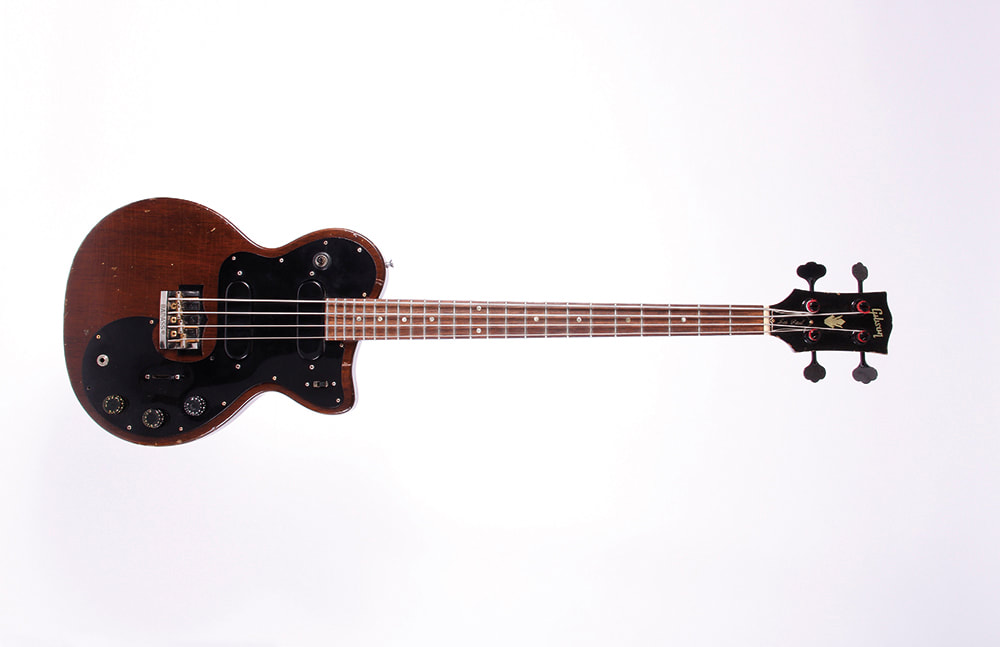
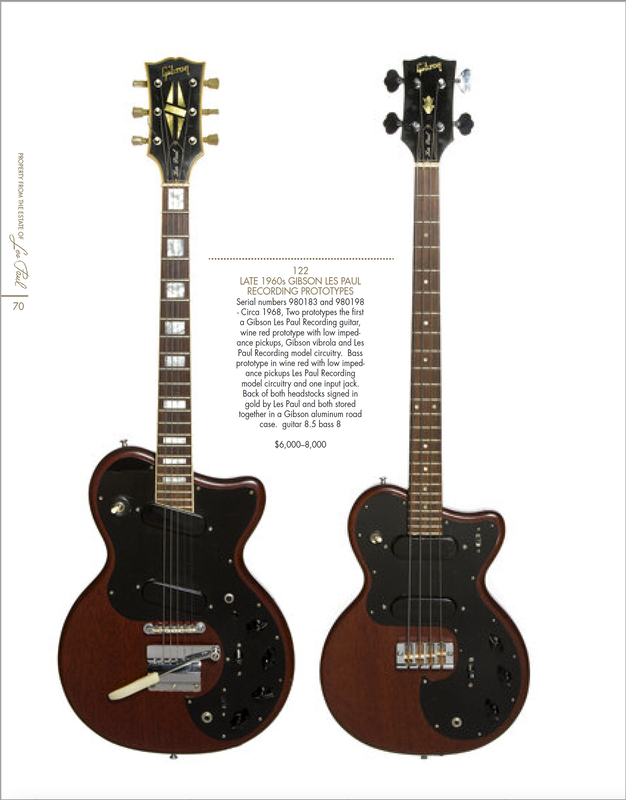
And a couple of years later (in 2012) I discovered another one exactly like mine in the auction brochure of the Les Paul estate auction. It was sold together with a Gibson guitar that had the exact same body shape.
Then I knew for sure it was a genuine Gibson Les Paul prototype and not just some weird employee build or homemade thing.
Then I knew for sure it was a genuine Gibson Les Paul prototype and not just some weird employee build or homemade thing.
|

|

|
And I have theory what happened to this bass.
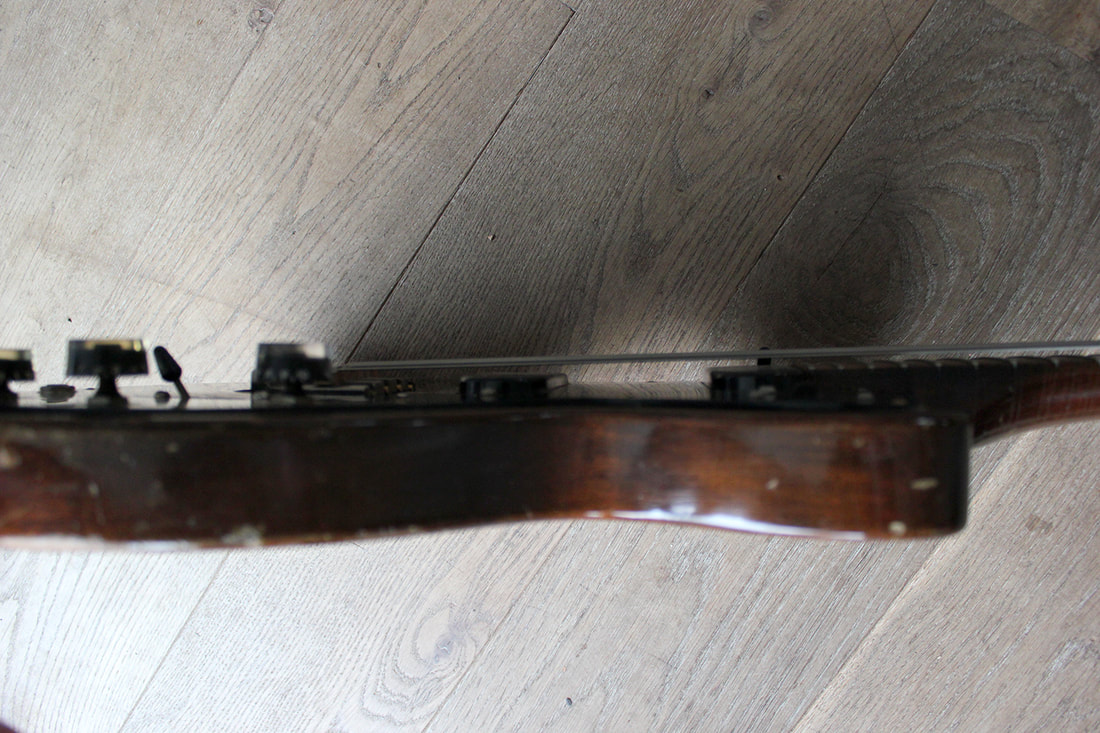
Near the neck joint there are tell tale signs of a repaired neck joint. The neck had not been removed by heating the glue, like you normally would when you want to remove a set neck. But the neck was brutally severed from its body by a strong impact. Like someone deliberately smashed it in two.
What could be the reason for destroying this bass? I think the neck angle was the reason. It is the wrong way around!
The body normally tilts back a bit in order for the bridge to allow for a decent action. But on this bass it tilts forward. Someone f*cked up at the Gibson factory...
|
|
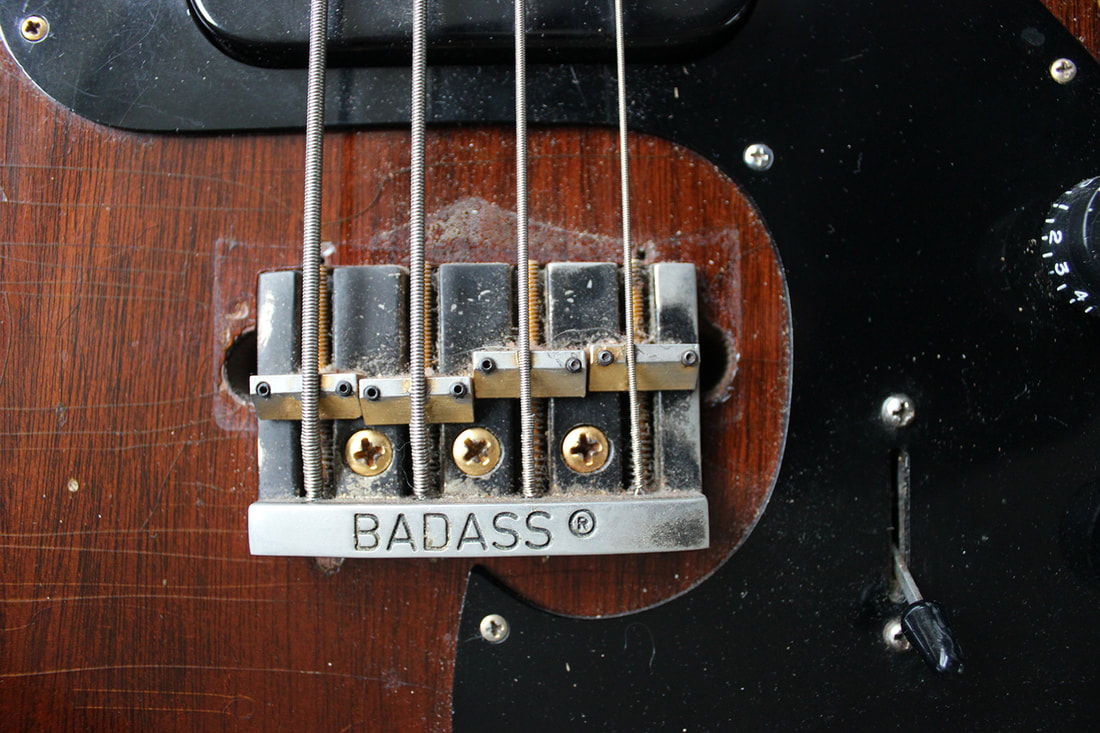
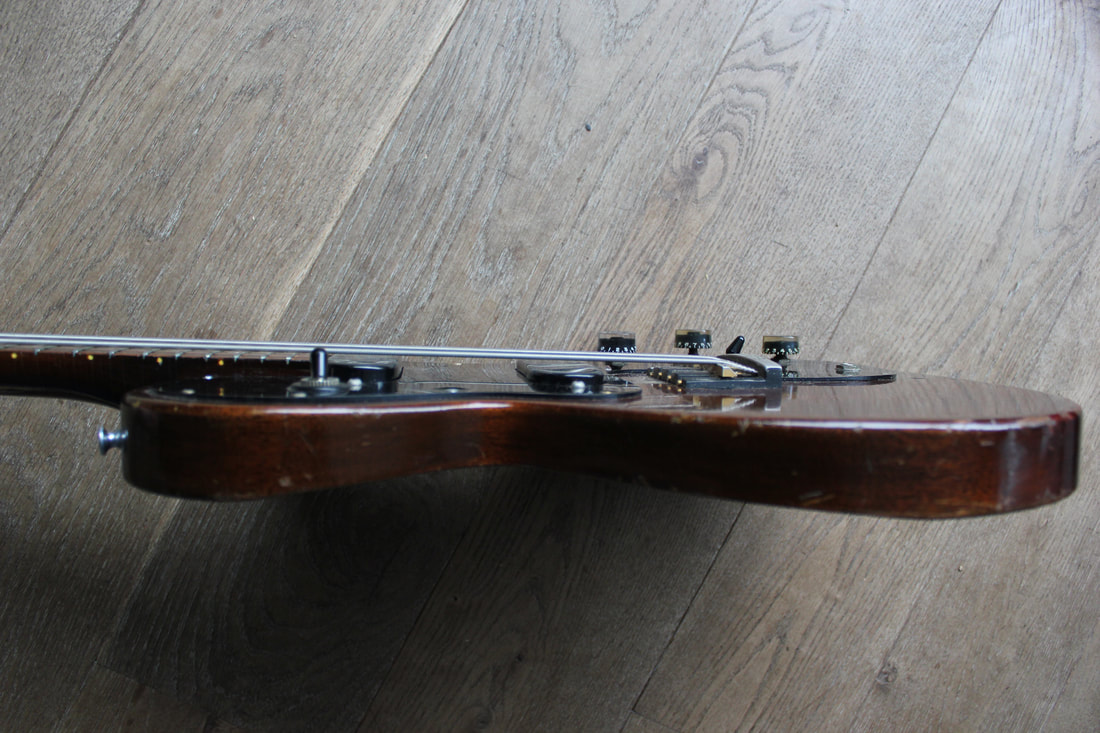
So Gibson rejected this prototype, removed the serial number (to prevent it from being sold?) and threw it in the bin. Then someone fished it out of the bin, took it home and glued the neck back. The glue seams are very nice and there's hardly any wood missing. Except on the top a few splinters maybe. A real clean and solid repair.
But the faulty neck angle had to be addressed. So the original two point bridge was removed. The posts and studs were taken out. Enter the Badass bridge. But that would be too high to get the action anywhere near playable. So the bridge had to be recessed into the body. Some sort of crown shaped piece of black plastic was glued onto the body to cover up the half exposed holes where the original studs had been.
But the bass was playable. The Badass bridge is a fine piece of hardware. It's just completely out of place on this bass...
But the bass was playable. The Badass bridge is a fine piece of hardware. It's just completely out of place on this bass...
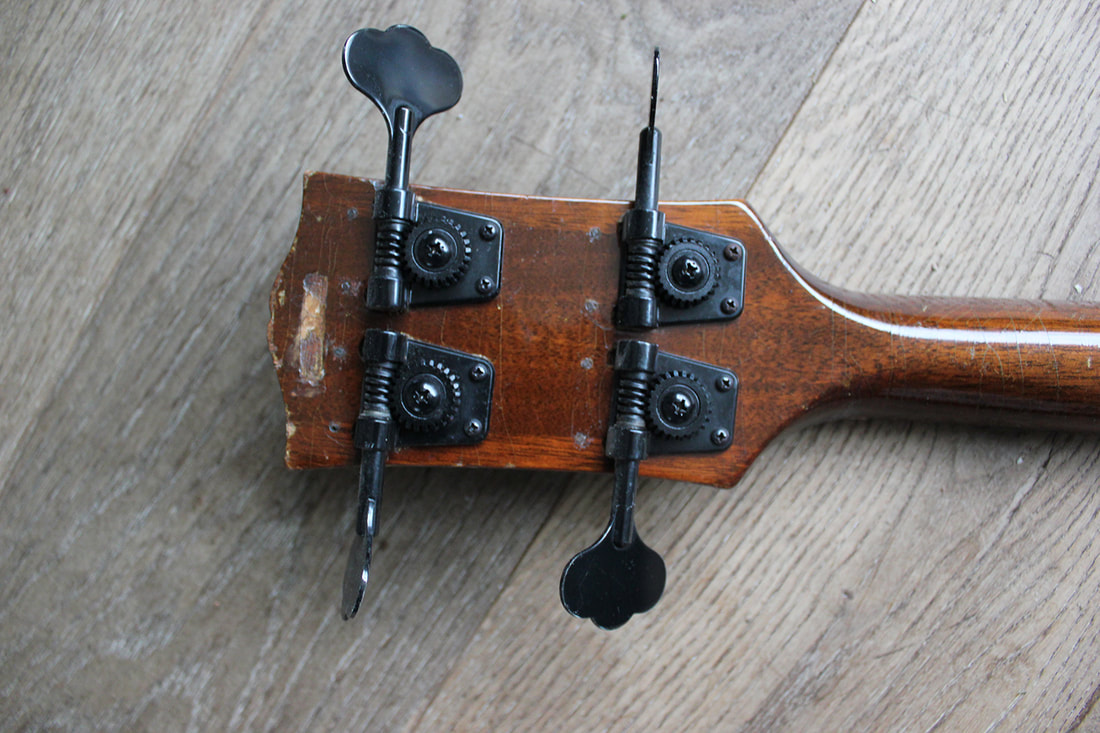
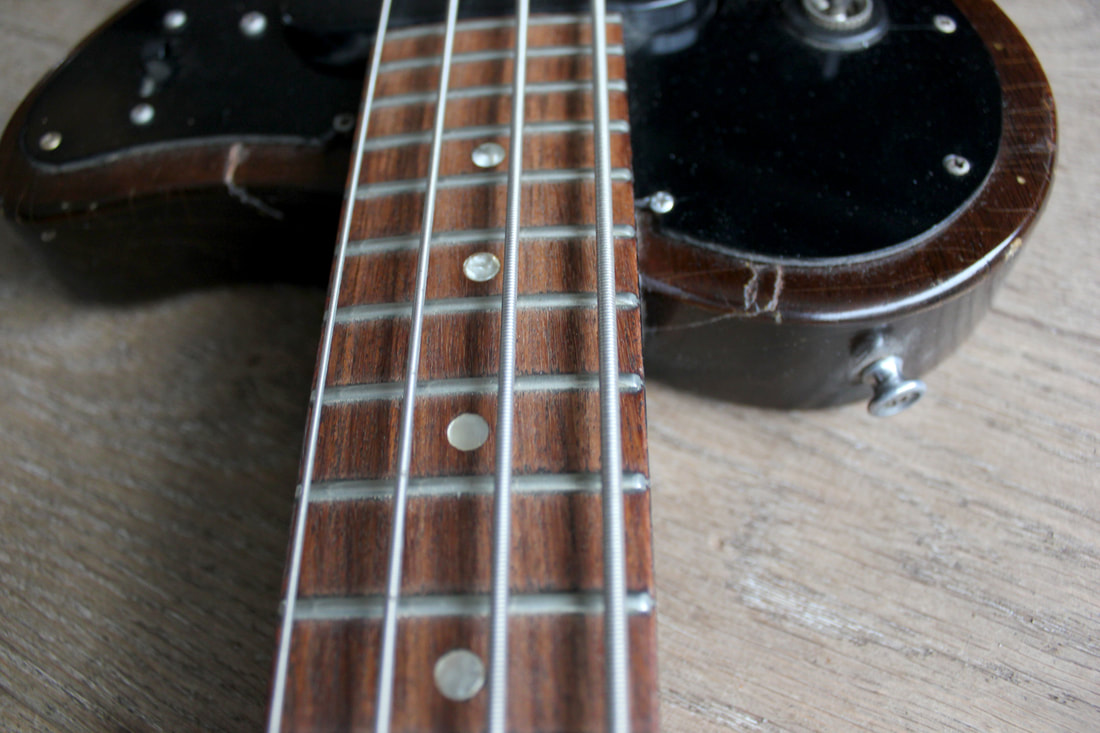
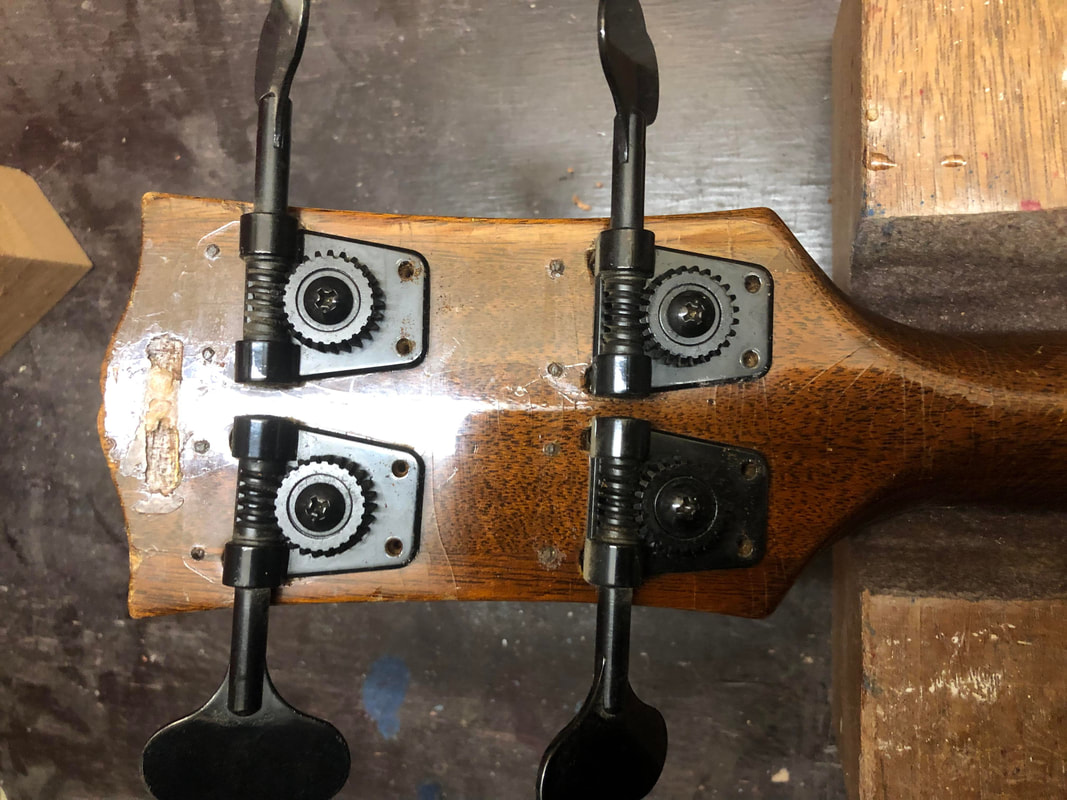
The original machine heads were removed as well and replaced by lighter weight Gotoh tuners. Reason for that is no doubt the rather serious neck dive. The body is simply too thin, too small and there too much wood routed away to offer a counter weight for old school vintage large clover tuners that Gibson used back in the day.
To make the Gotoh tuners fit the holes in the headstock were drilled wider.
To make the Gotoh tuners fit the holes in the headstock were drilled wider.
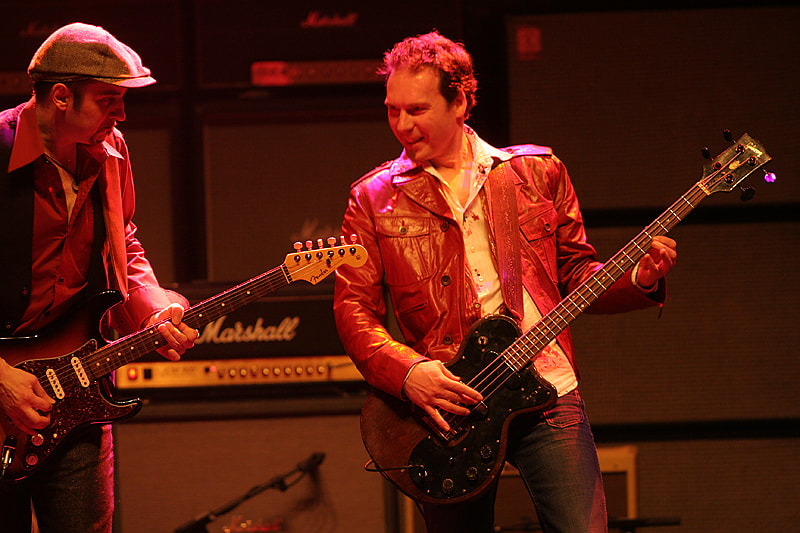
I have performed with this bass on several stages. But I've always been a bit reluctant to take it with me on the road because its such a rare and valuable instrument. The pictures below are from the gig I did with Stonefly, supporting for Whitesnake in Tilburg 2008.

|
|
The restoration step by step (starting january 2023)
I've had this bass for over 15 years. And I have come to the point that I have gathered enough confidence as a luthier to start a full restoration for this bass., My goal is to bring it back in its original state as good as I possibly can.
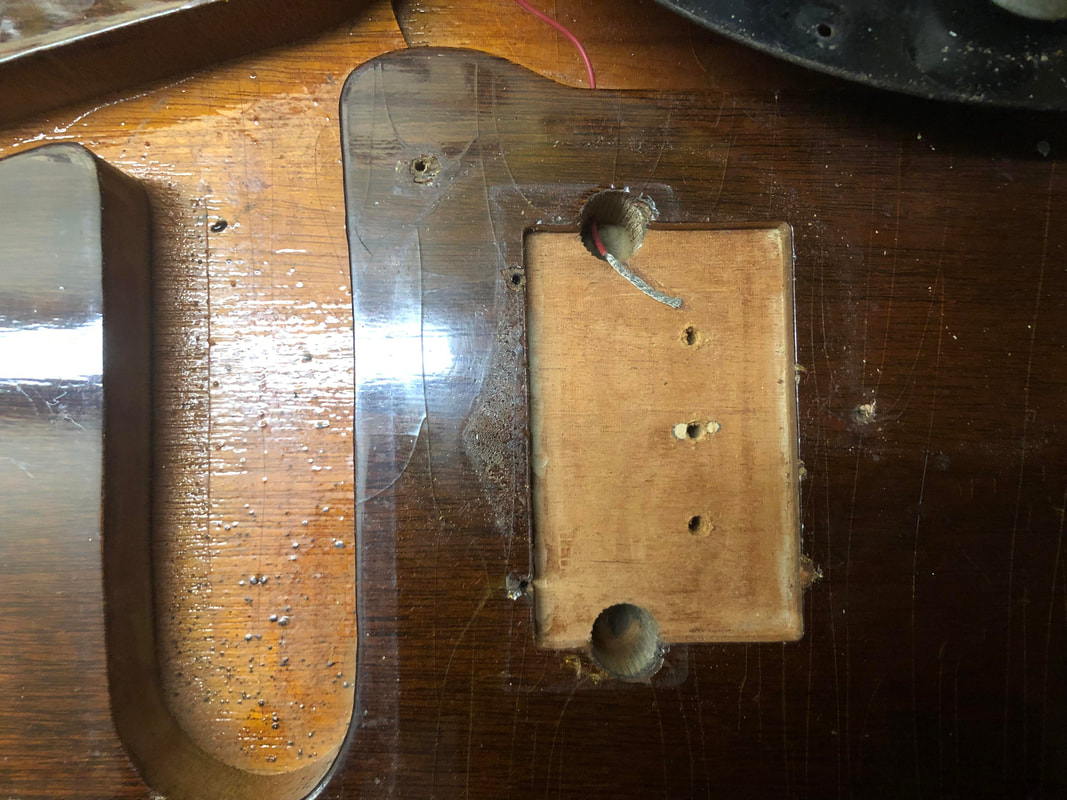
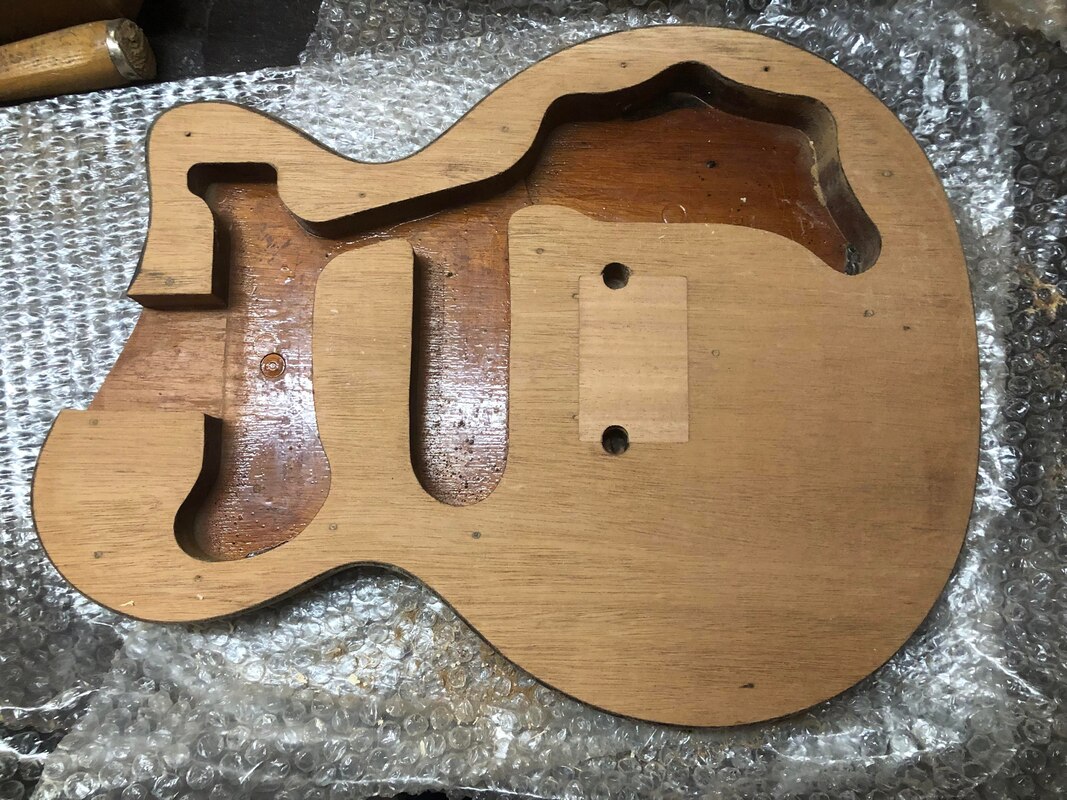
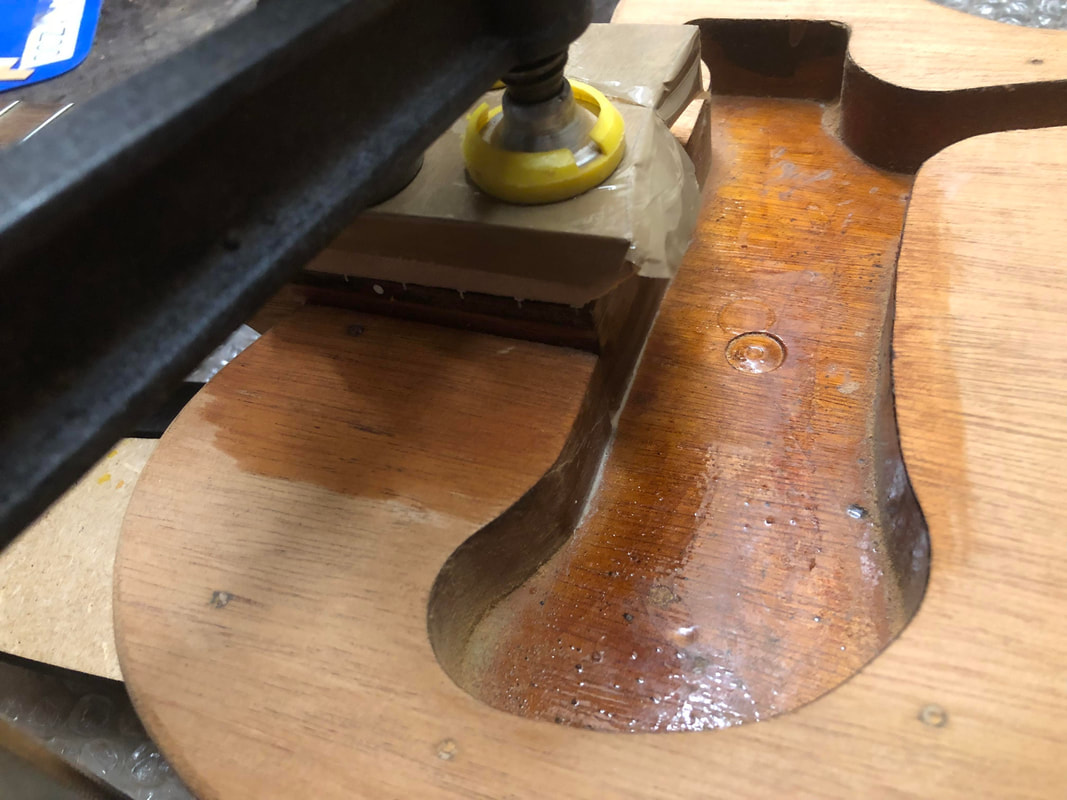
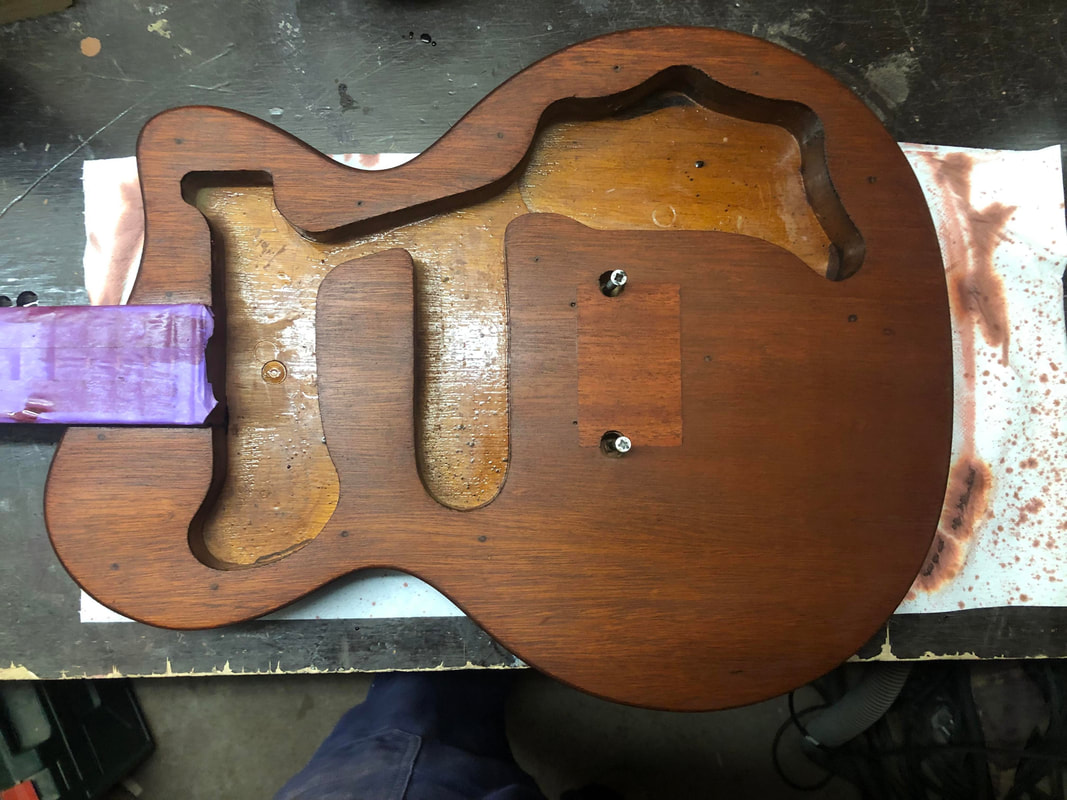
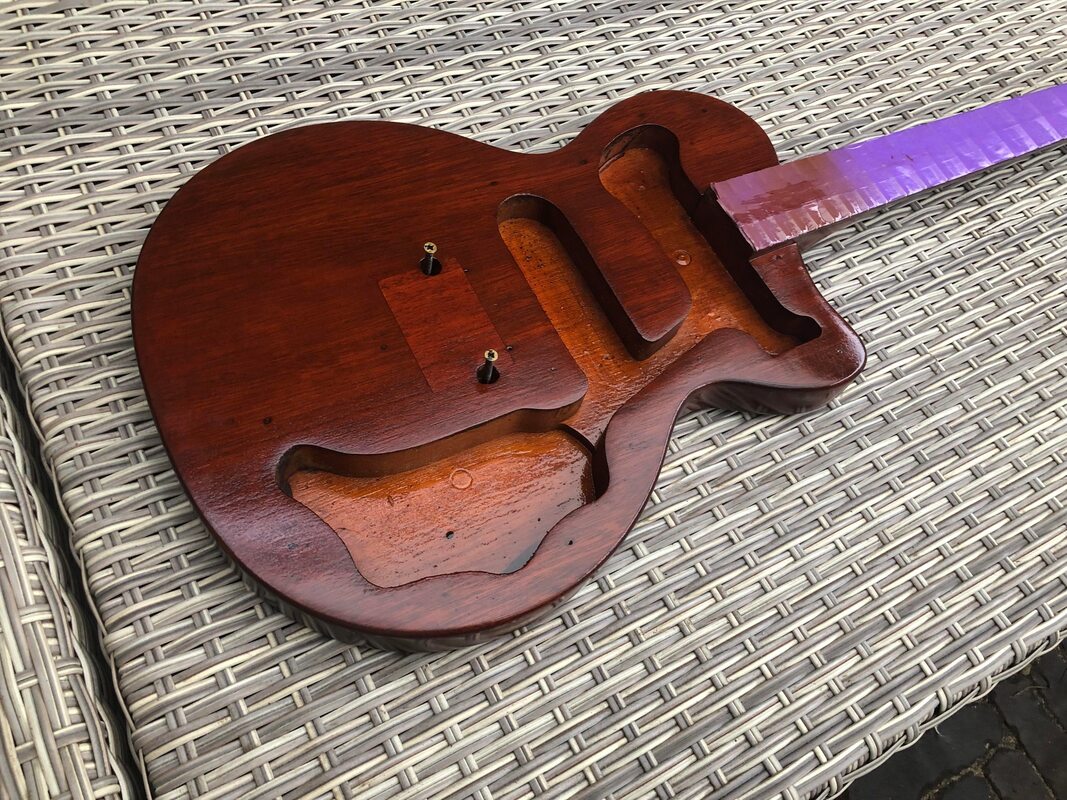
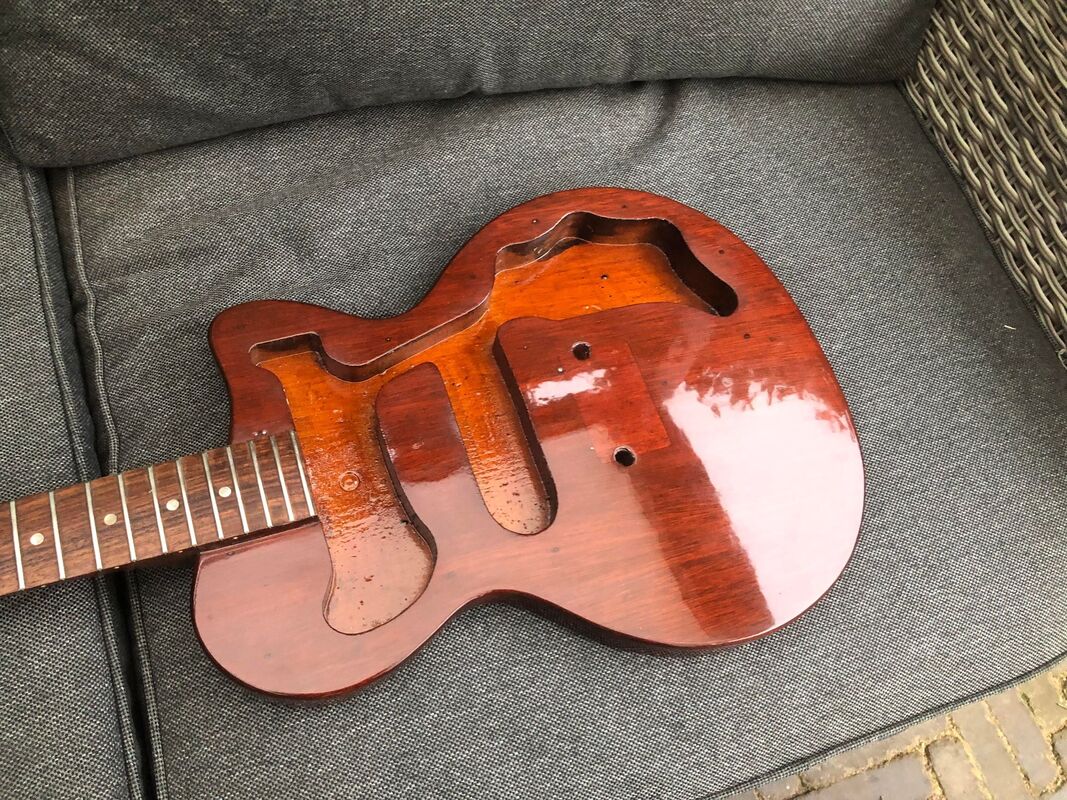
First thing I did was remove the loaded pickguard/controlplate.
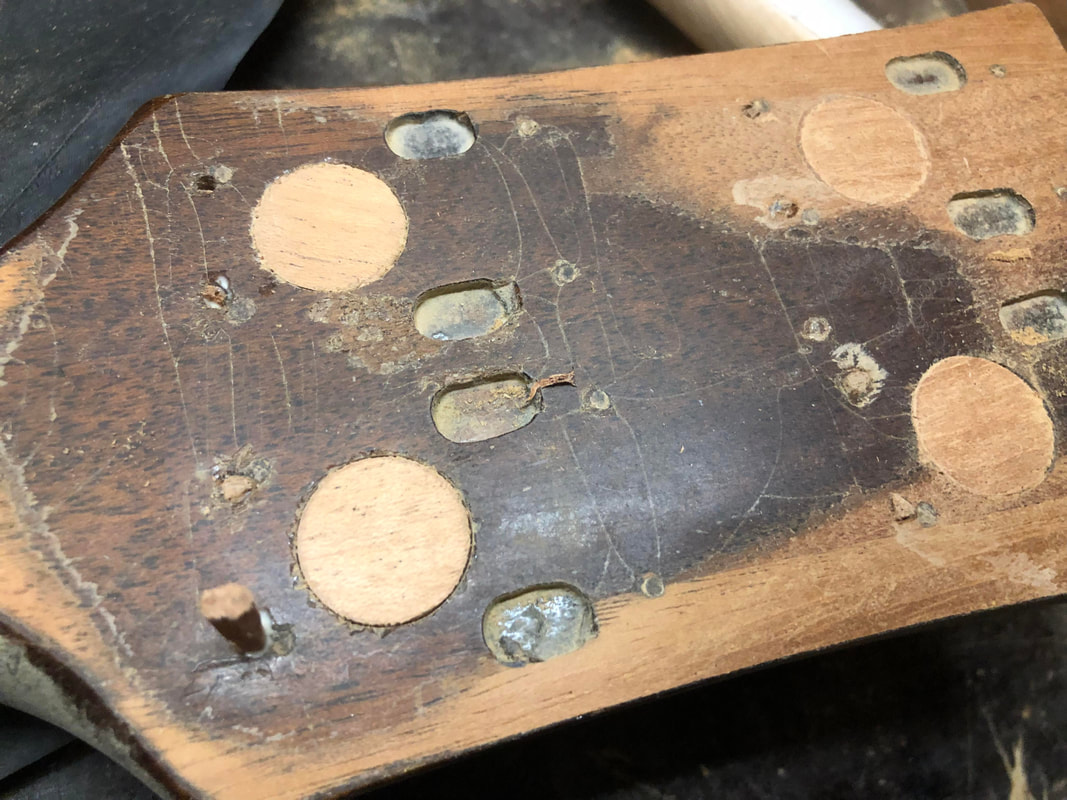
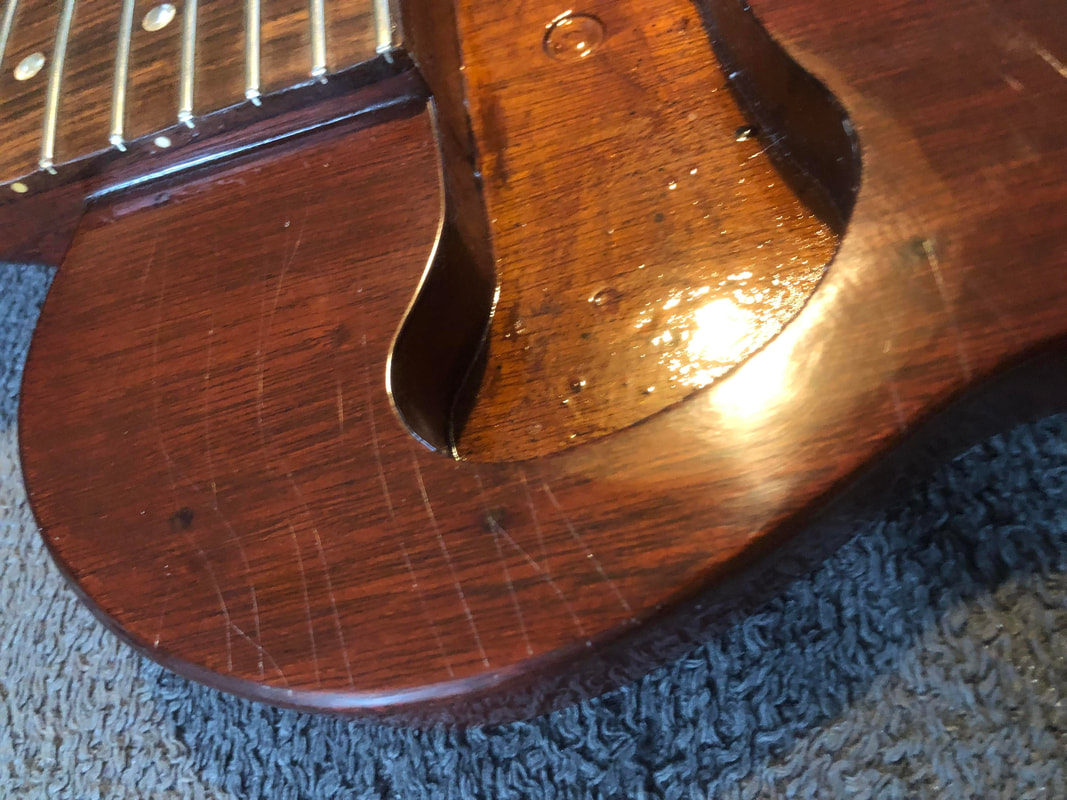
That laid bare the large "swimming pool" that lurked underneath.
First thing I did was remove the loaded pickguard/controlplate.
That laid bare the large "swimming pool" that lurked underneath.
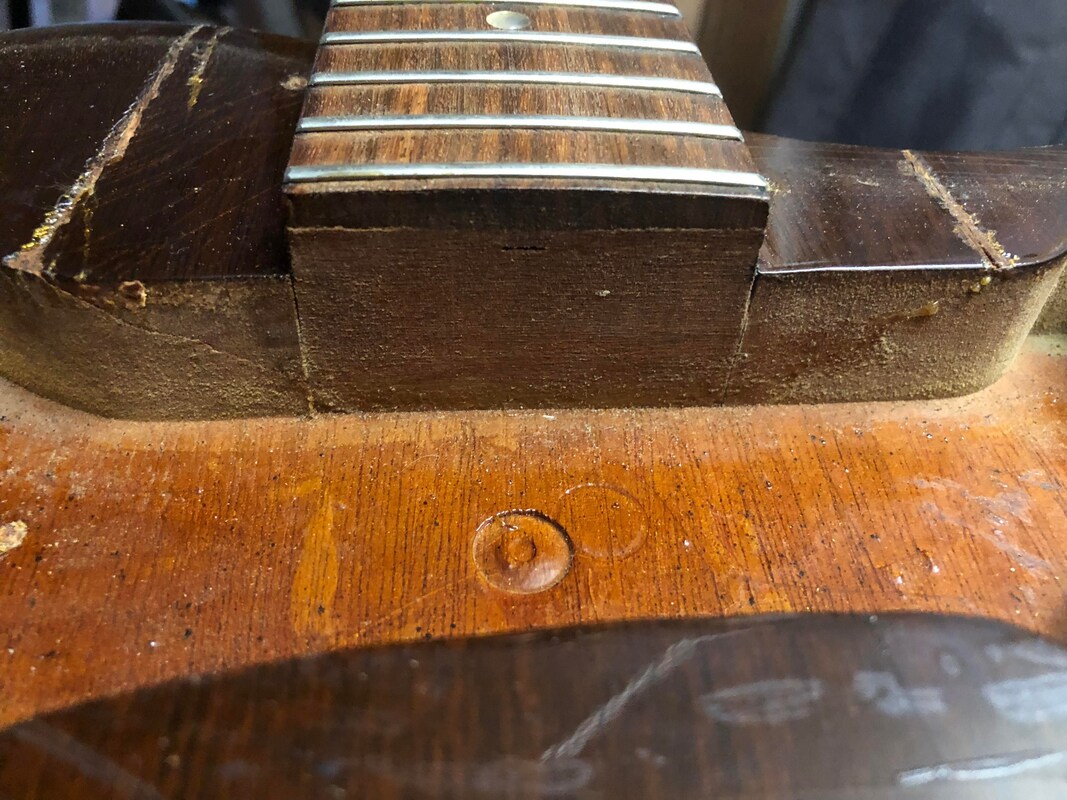
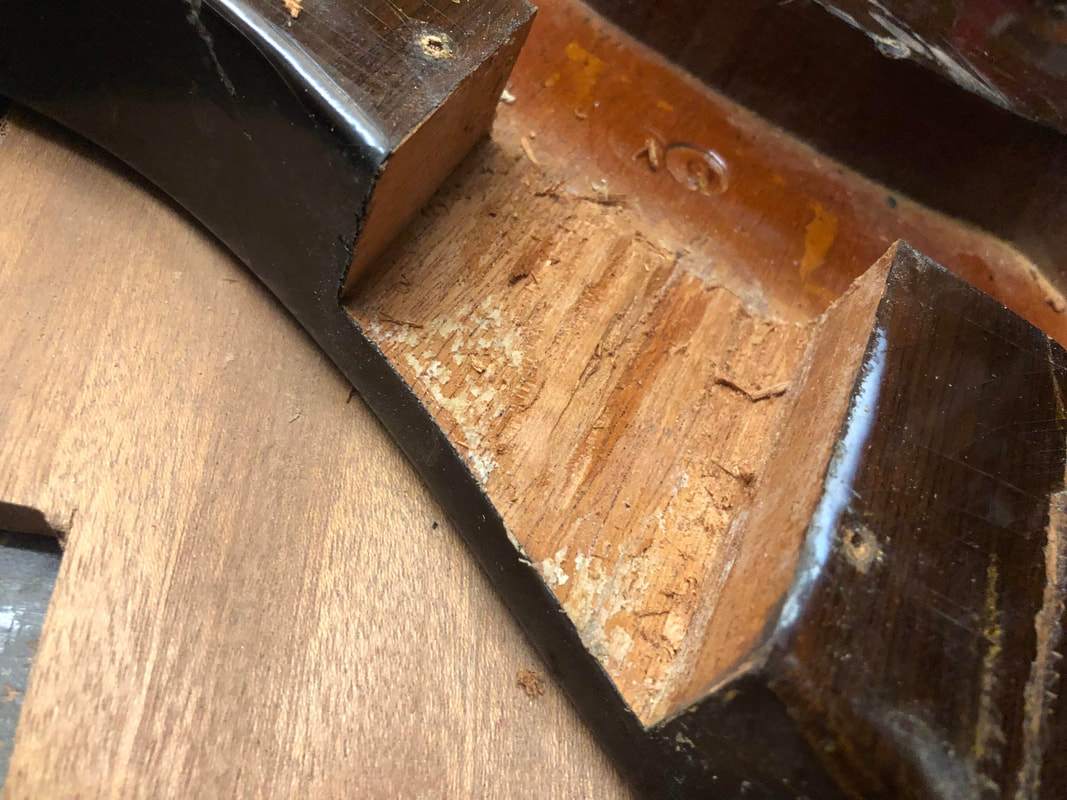
And it gave a good clear view of the neck joint repair. You clearly see two diagonal glue seams. One on either side of the neck. In the lower left corner of the neck you see the diagonal line running into the heel of the neck.
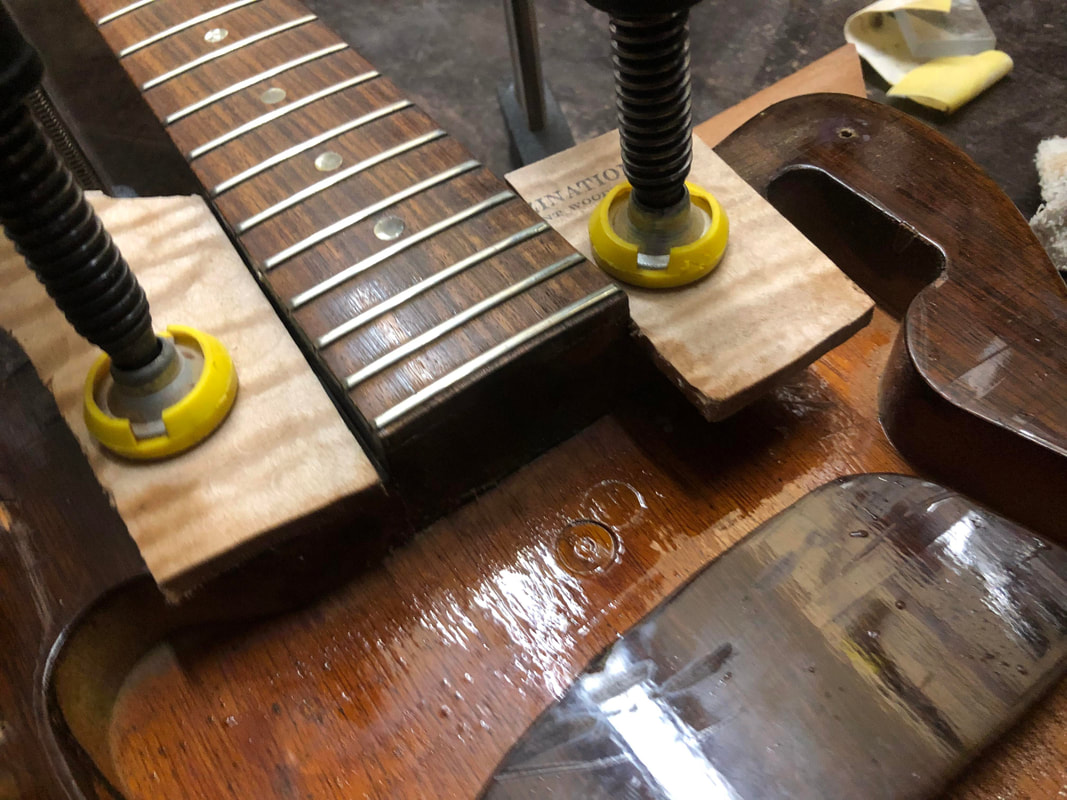
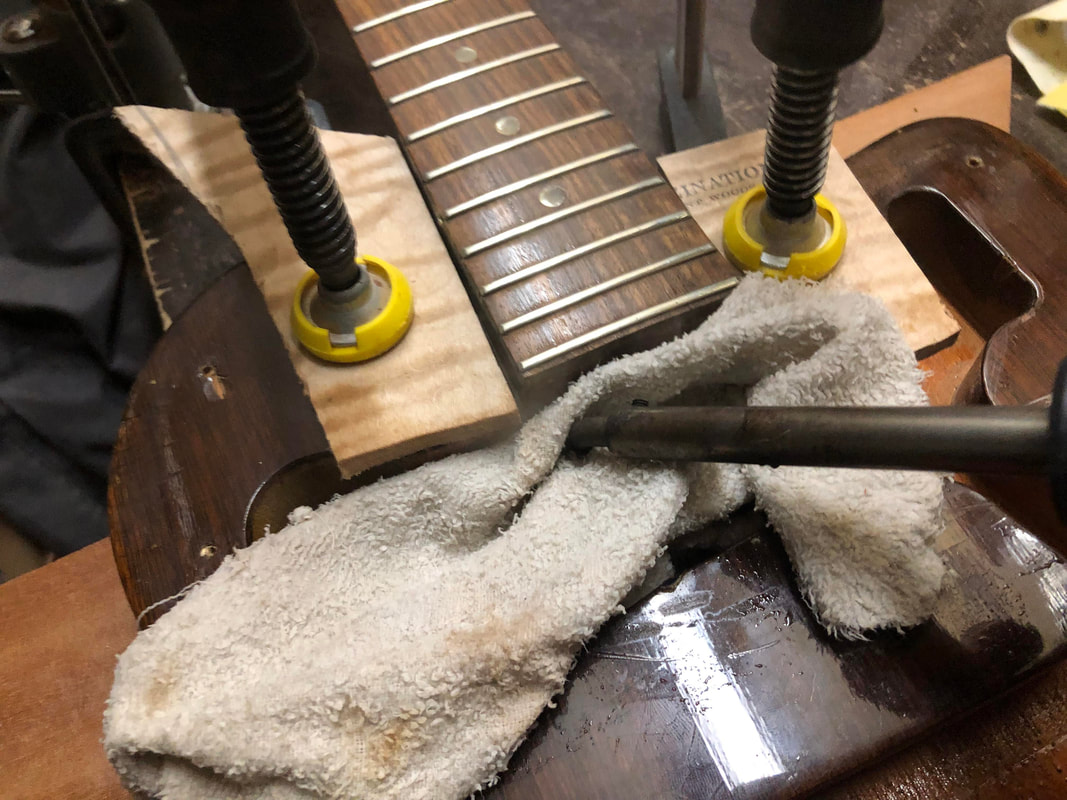
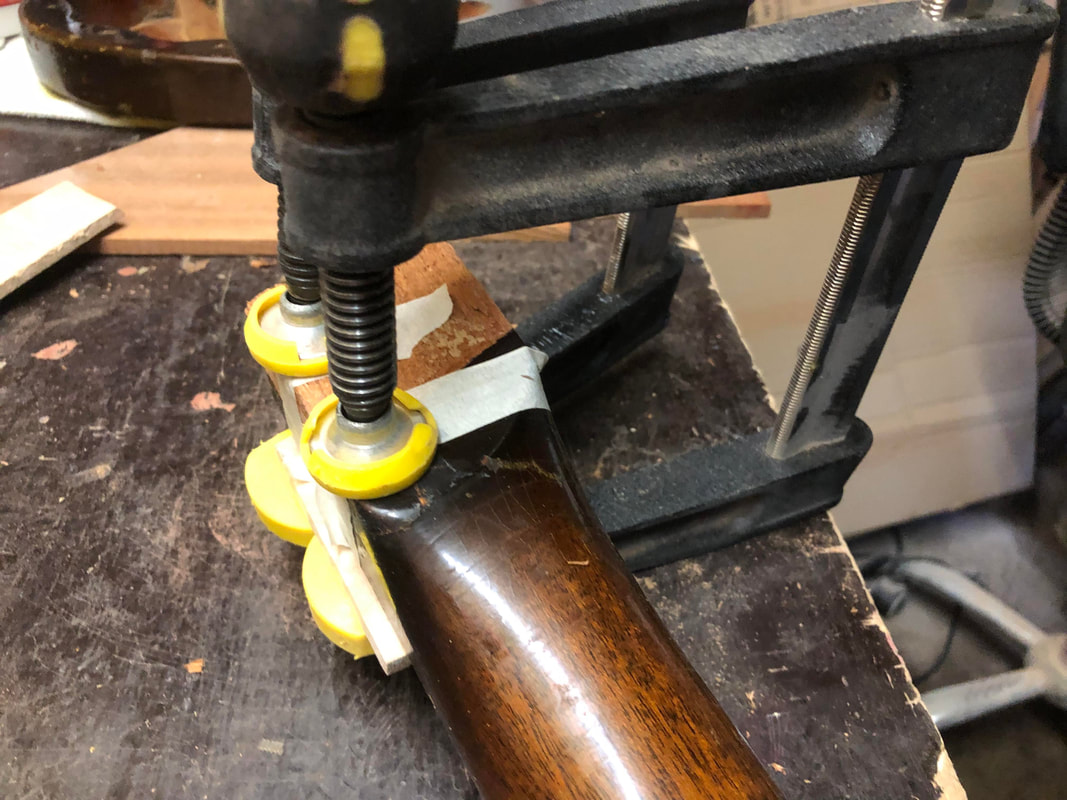
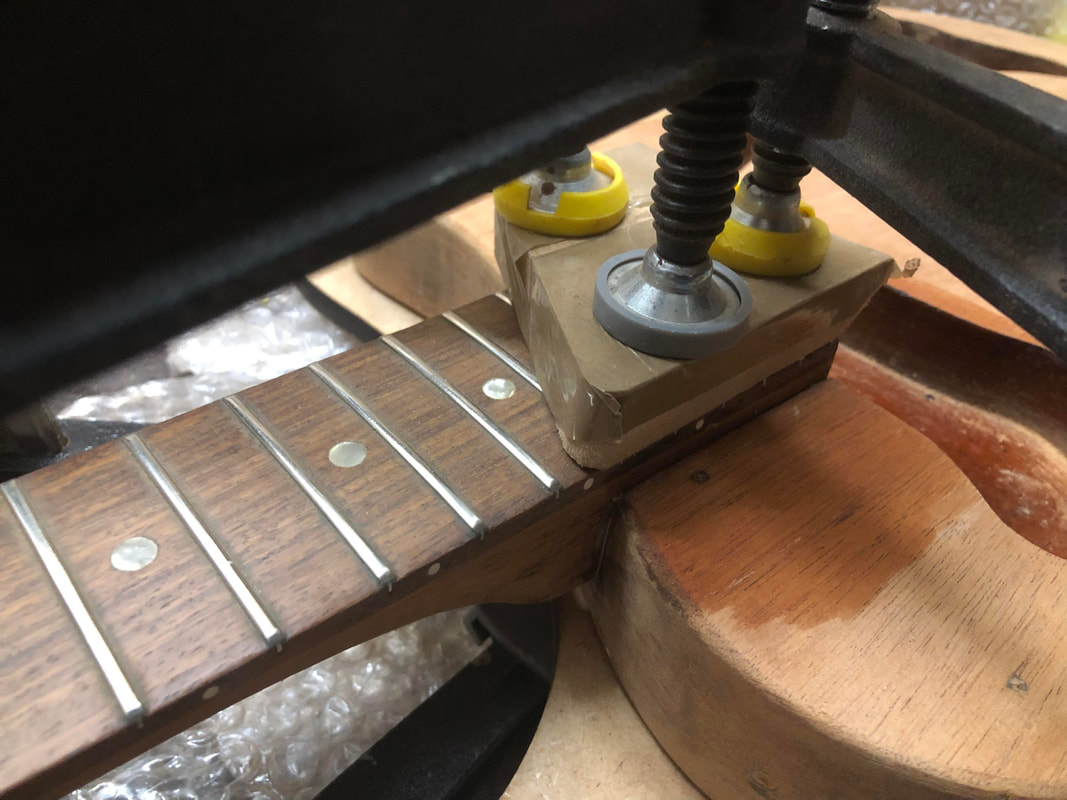
I clamped the body on either side of the neck to make sure it wouldn't budge when I started to wiggle the neck loose.
And I used an old soldering iron to heat the glue joints of the actual neck joint. And a damp cloth in between the iron and the wood to prevent the wood from scorching.
And I used an old soldering iron to heat the glue joints of the actual neck joint. And a damp cloth in between the iron and the wood to prevent the wood from scorching.
|
|
After being heated for a while I could slowly start to wiggle the neck joint loose. I was hoping to get the heel out without any damage. But a few small parts of the heel decided to stay put. Such as that little triangular part on the lower left corner. But I didn't worry too much, because I was going to reshape the heel anyway to give it a proper angle into the body. I did glue a small part back onto the heel, because the broken off piece runs out towards the other end of the heel.
|
|
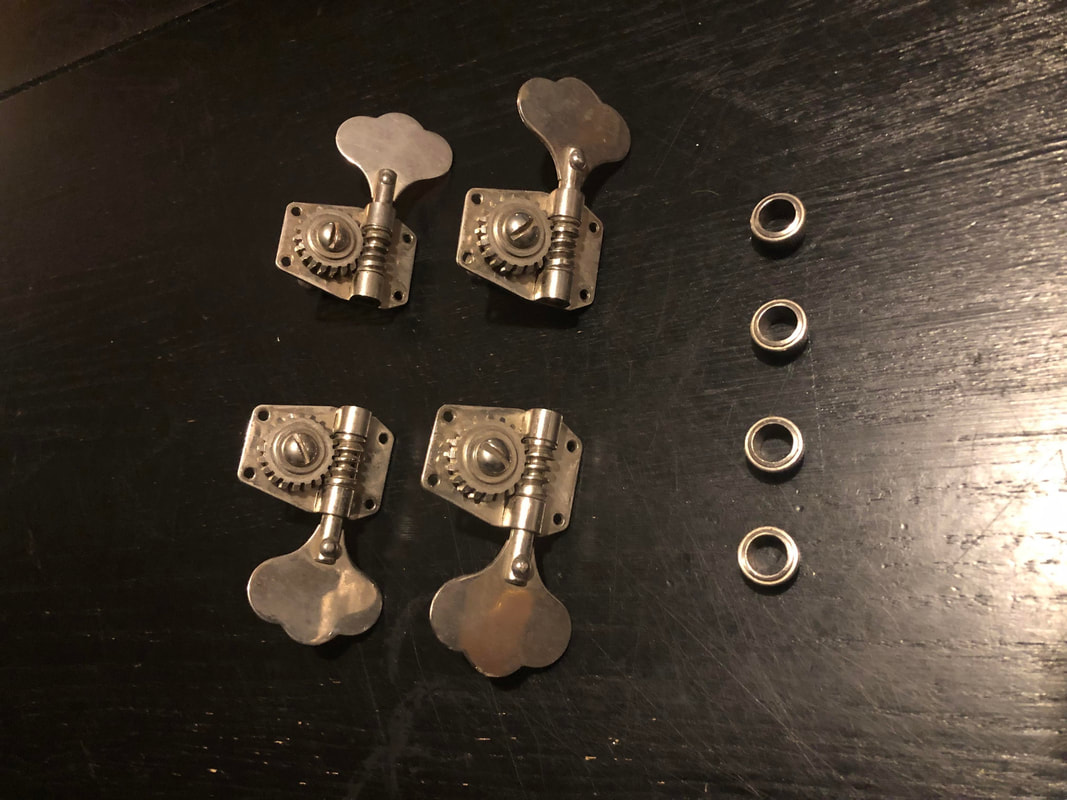
I found a set of period correct vintage machine heads (tuners) for this bass. I knew what model they were supposed to be be looking at the bass in the Les Paul estate auction brochure. And the Gibson Bass Book of course!
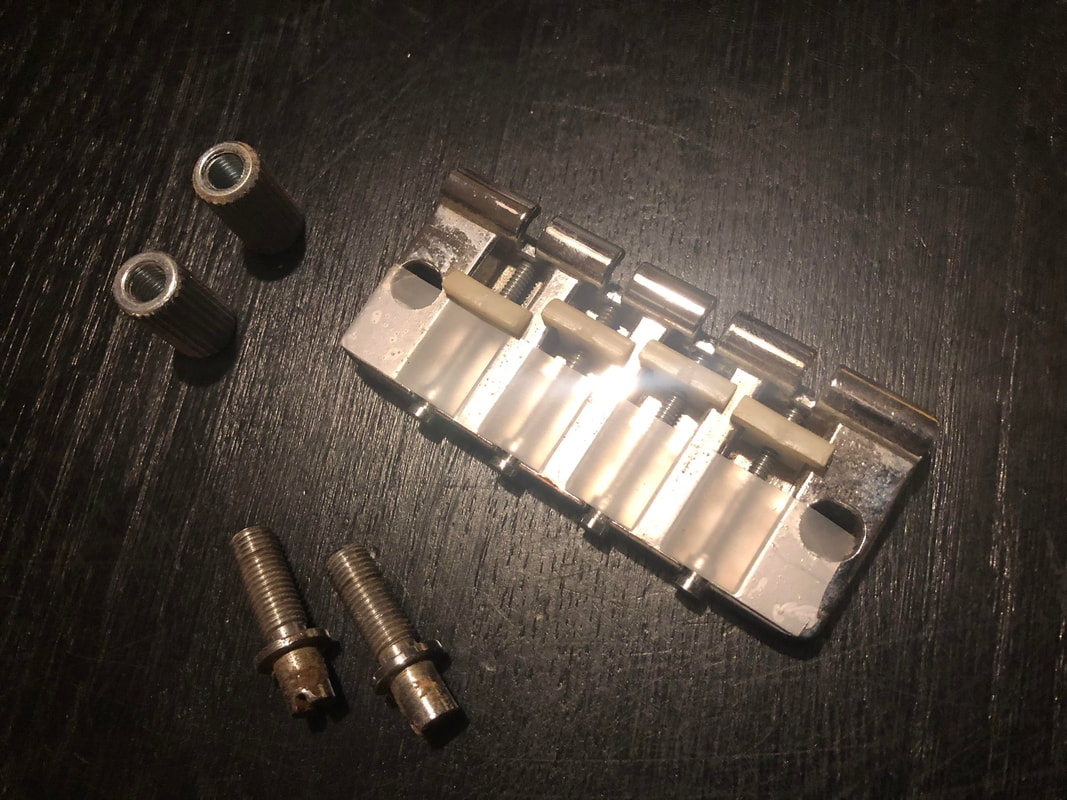
Plus I found a period correct two-point bridge with un-notched Delrin (nylon) saddles and the required inserts and bridge posts.
Plus I found a period correct two-point bridge with un-notched Delrin (nylon) saddles and the required inserts and bridge posts.
|
|
I feared the old screw holes of the original tuners were just cut off, leaving part of the screw in the head. But I think it's just darker colored pieces of wood. Or maybe just sawdust and glue?
I took the aftermarket tuners off. And this revealed another problem I had to address: the tuner holes were too wide for the original tuners. I was going to have to plug the holes and re-drill smaller ones.
I took the aftermarket tuners off. And this revealed another problem I had to address: the tuner holes were too wide for the original tuners. I was going to have to plug the holes and re-drill smaller ones.
|
|
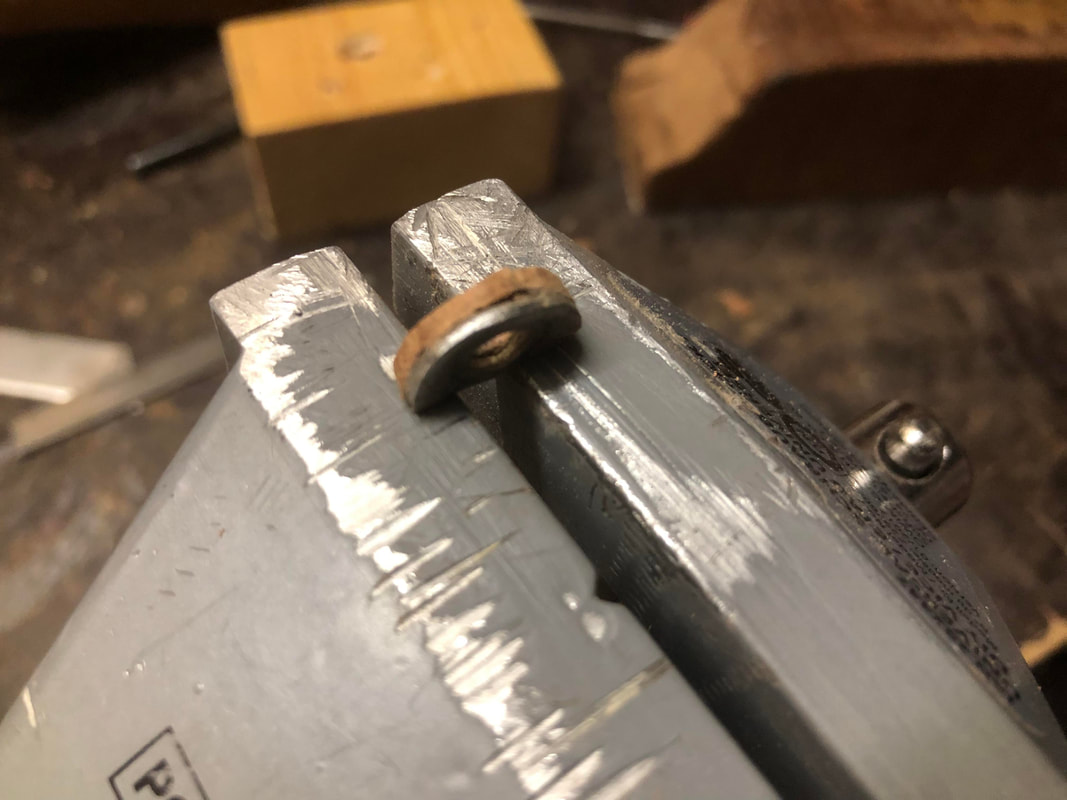
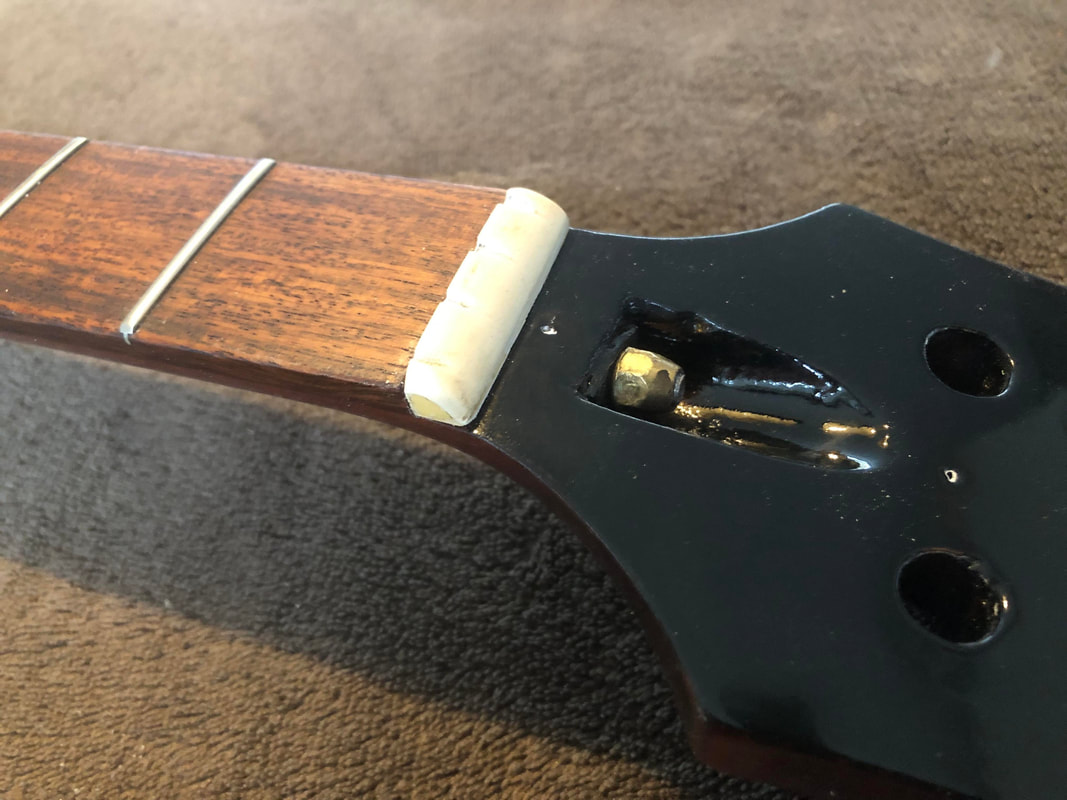
The truss rod cavity, and in particular the part near the nut needed some attention. The washer between the brass nut and the wood has gnawed its way into the wood and lifted a chip up.
|
|
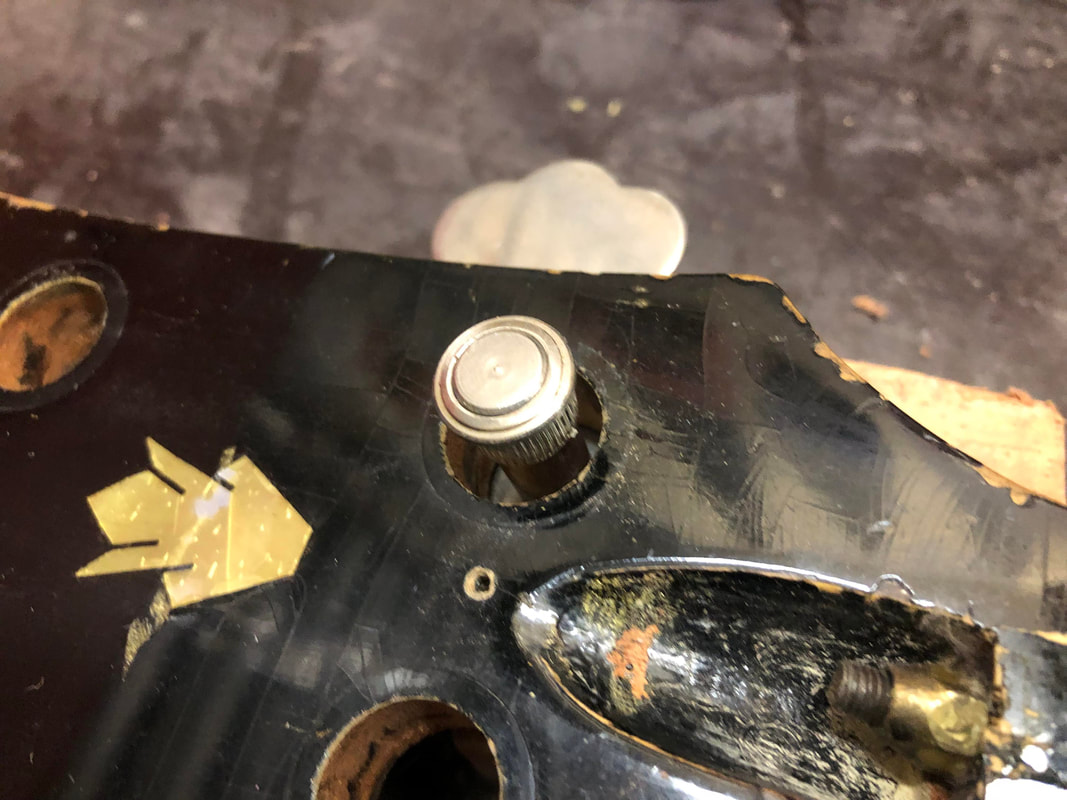
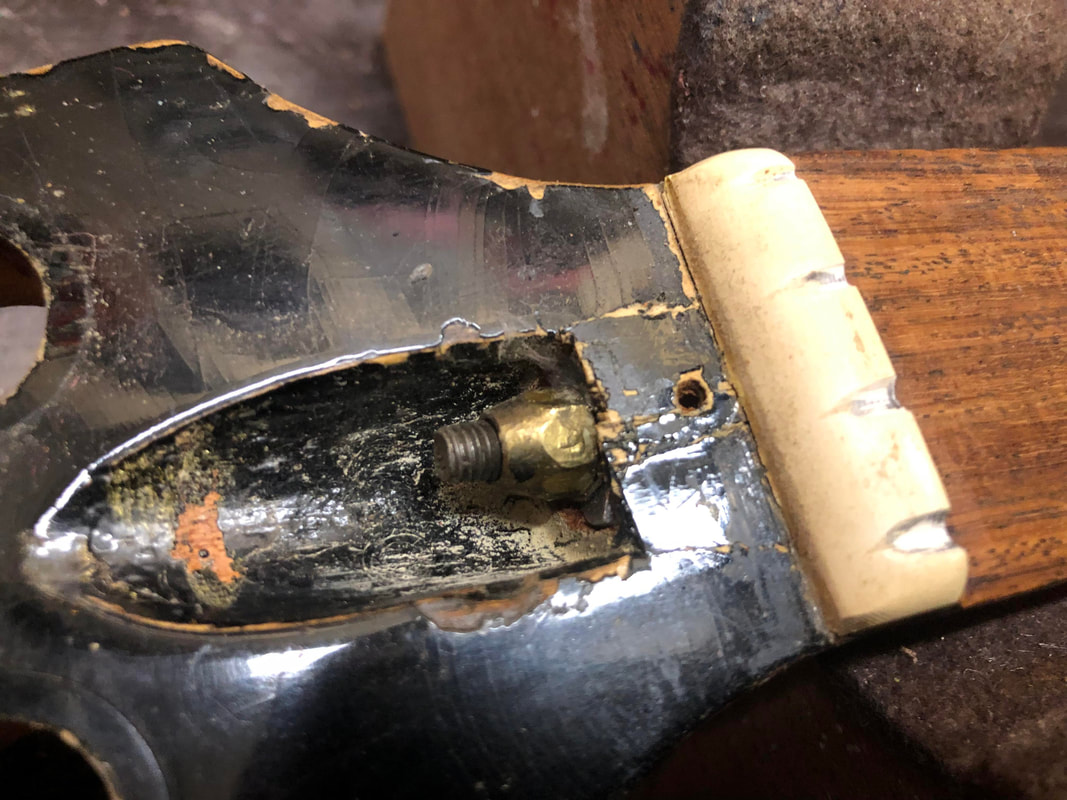
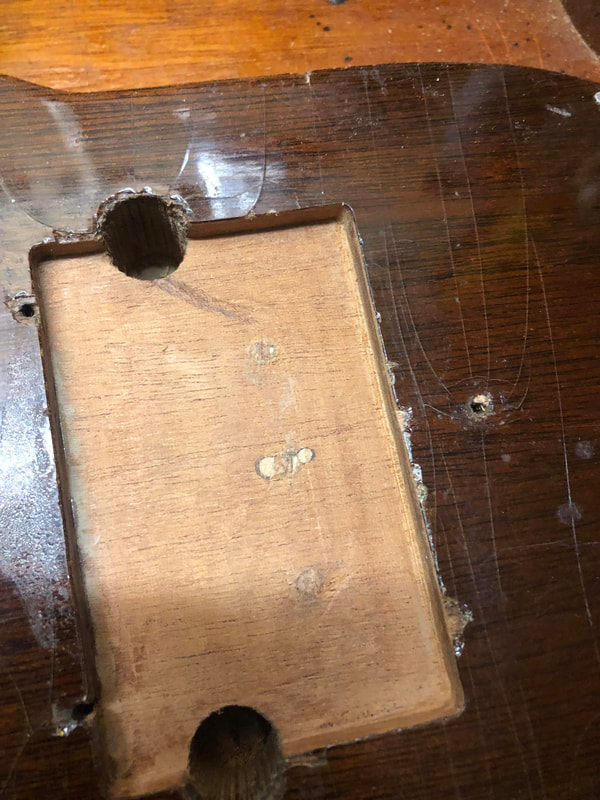
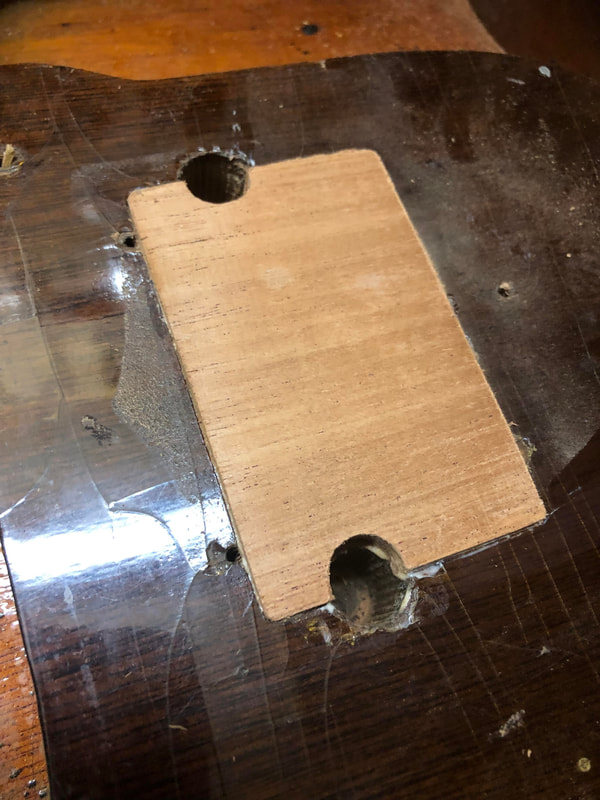
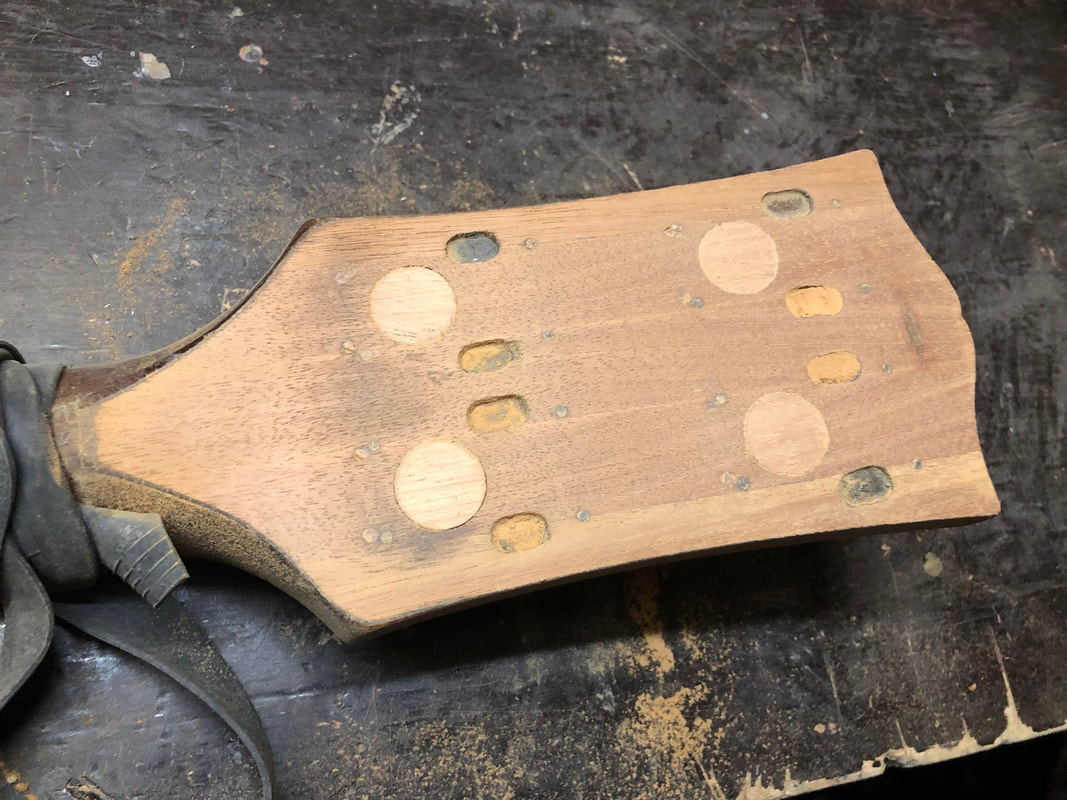
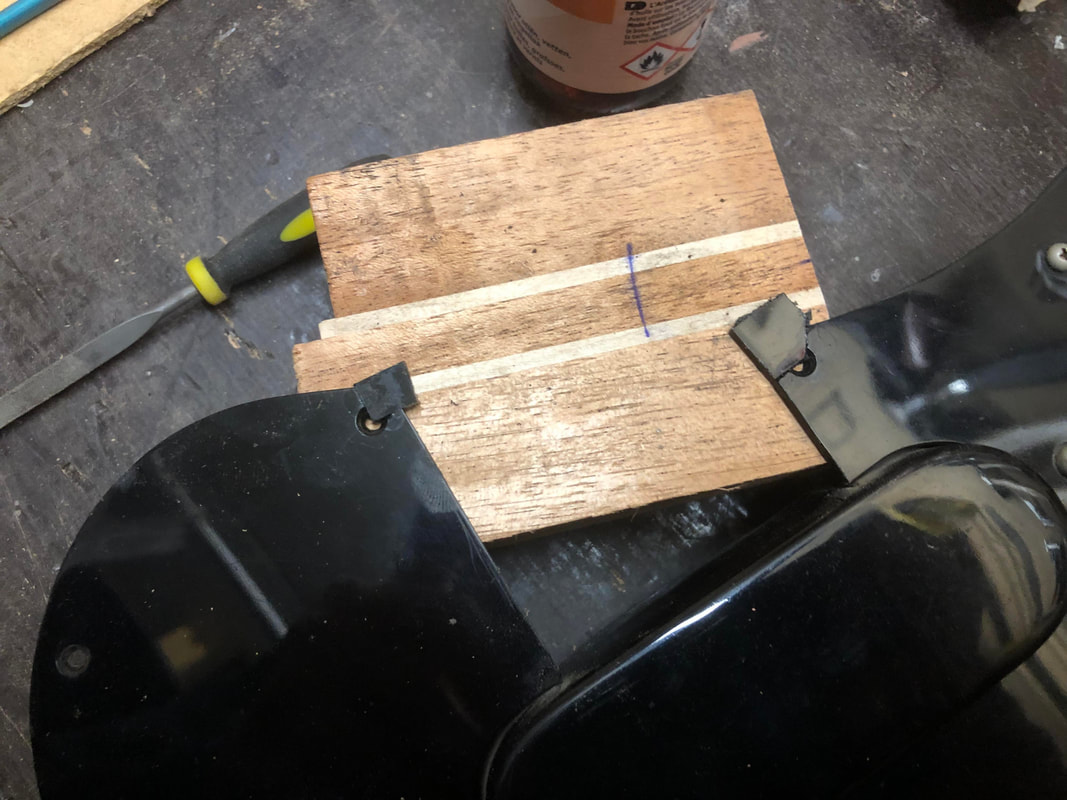
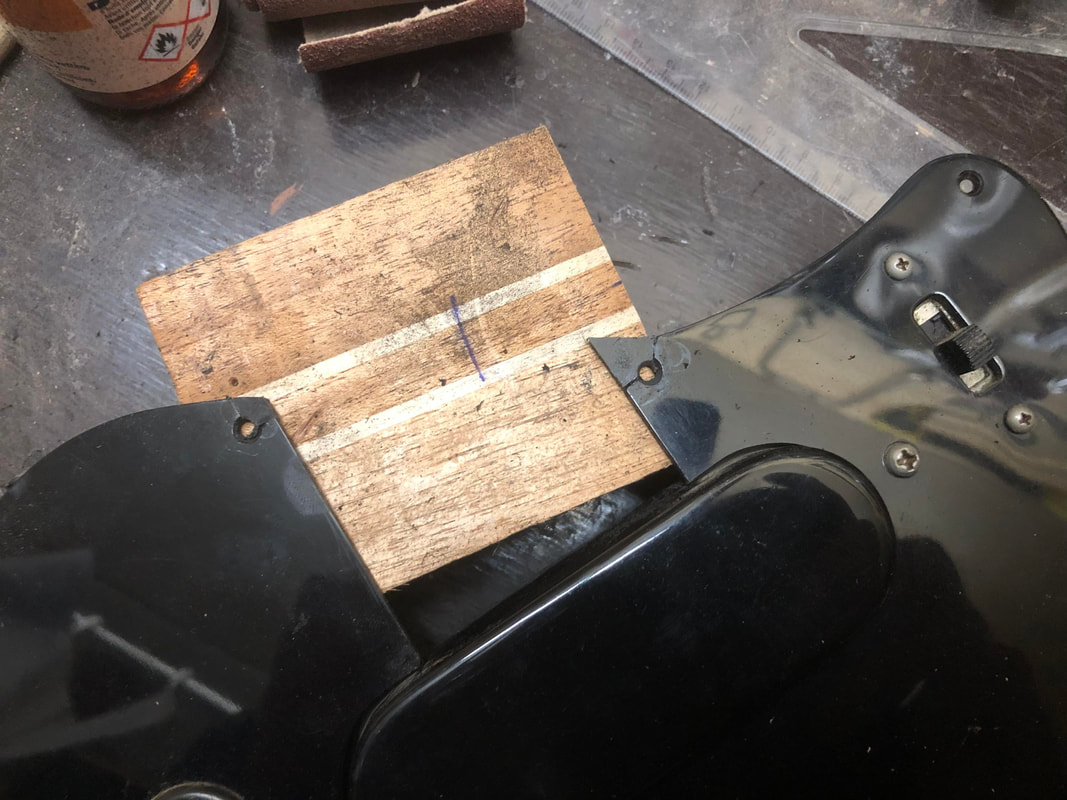
The routed rectangle where the Badass bridge sat had to be filled.
First I plugged the three screw holes. I did not bother to fill the two tell tale holes where the mute once sat (on the front side of the bridge)
First I plugged the three screw holes. I did not bother to fill the two tell tale holes where the mute once sat (on the front side of the bridge)
|
|
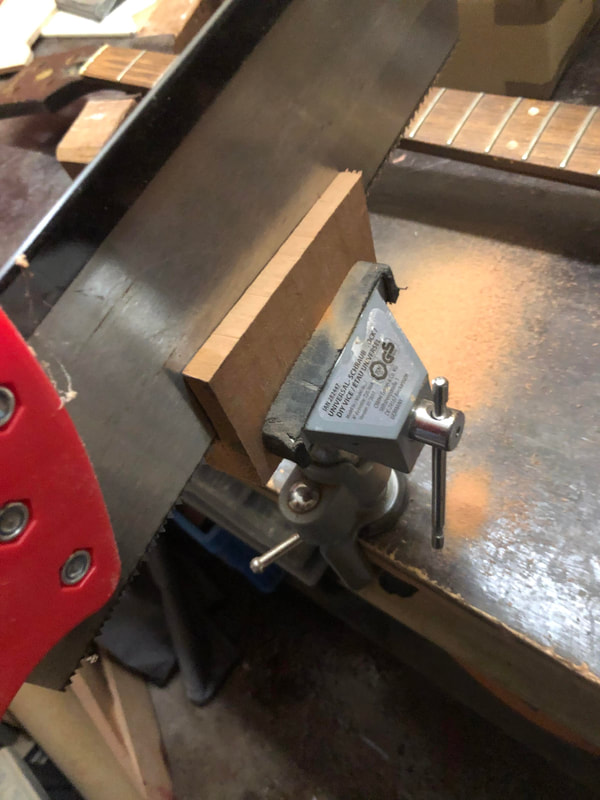
Then I looked for a piece of mahogany with the right color and grain. Made a matching piece and glued it in. But It will always be visible. But luckily most of the two point bridge will obscure the insert.
|
|
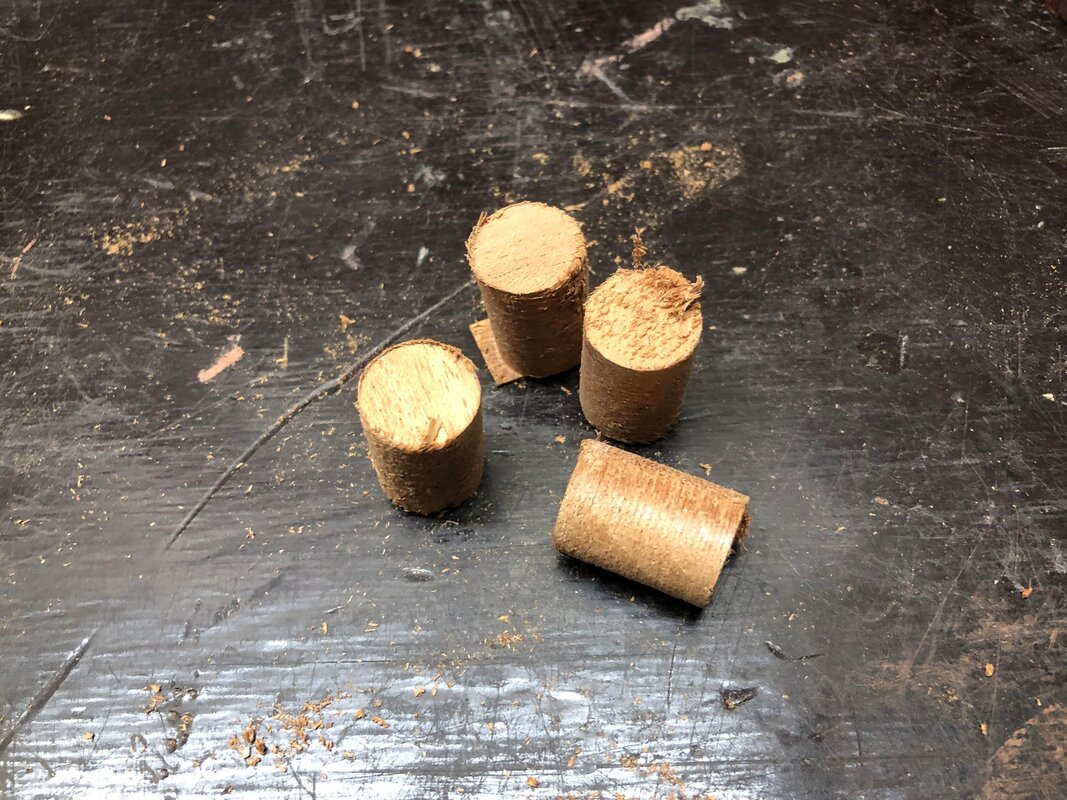
Made four mahogany plugs for the oversized tuner holes. I used a 21mm hole saw. The plug that it takes out happens to be exactly 17mm! A perfect fit for the tuner holes.

|
|
Glued the plugs into the tuner holes. While that dried, I shifted my attention to the trussrod cavity. I noticed the fretboard was lifting a little bit from the neck. The lacquer showed a crack. So I decided to loosen the brass hex nut and remove the plastic topnut.
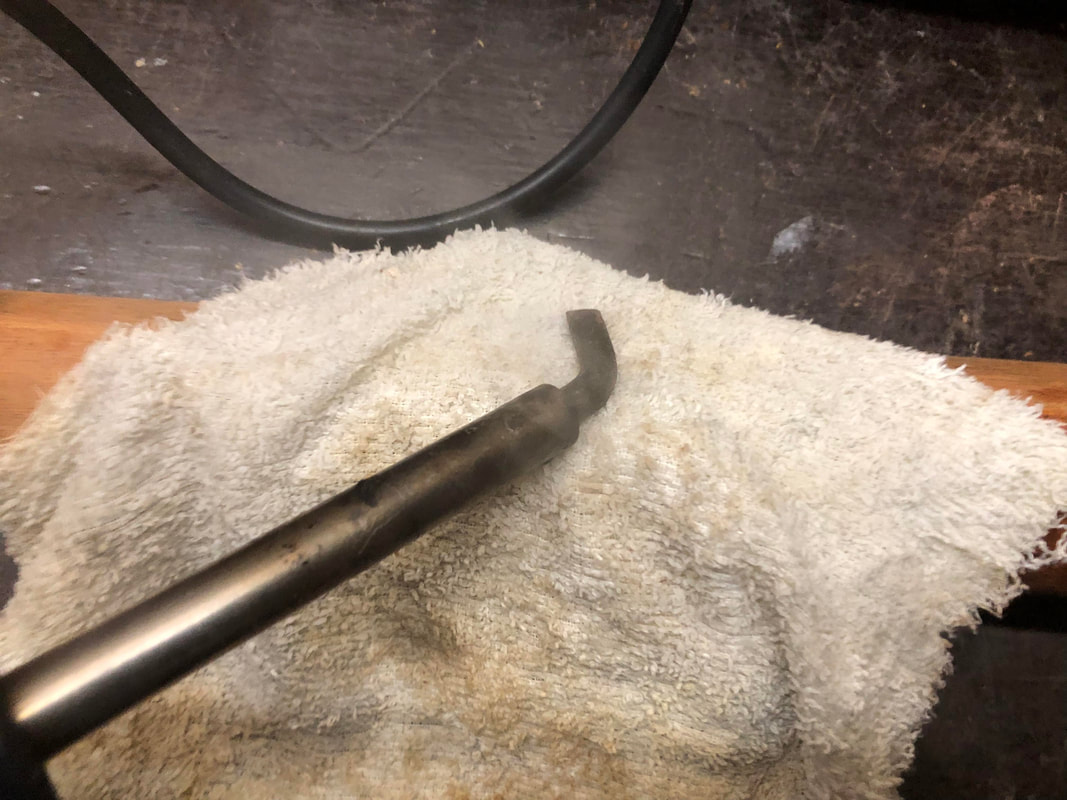
The cavity wasn't centered properly. I could barely get the little wrench tool in to loosen the brass nut. So I carefully scraped away a few chips on the narrow side of the nut. Just enough to get the little tool in and remove the brass hex nut.
The cavity wasn't centered properly. I could barely get the little wrench tool in to loosen the brass nut. So I carefully scraped away a few chips on the narrow side of the nut. Just enough to get the little tool in and remove the brass hex nut.

|
|
I carefully pried the little gap open with a razor blade. And put some Titebond in that I diluded with a bit of water, to make sure it would run all the way in. Then clamped it with a rubber band (strip of inner bicyle tube).
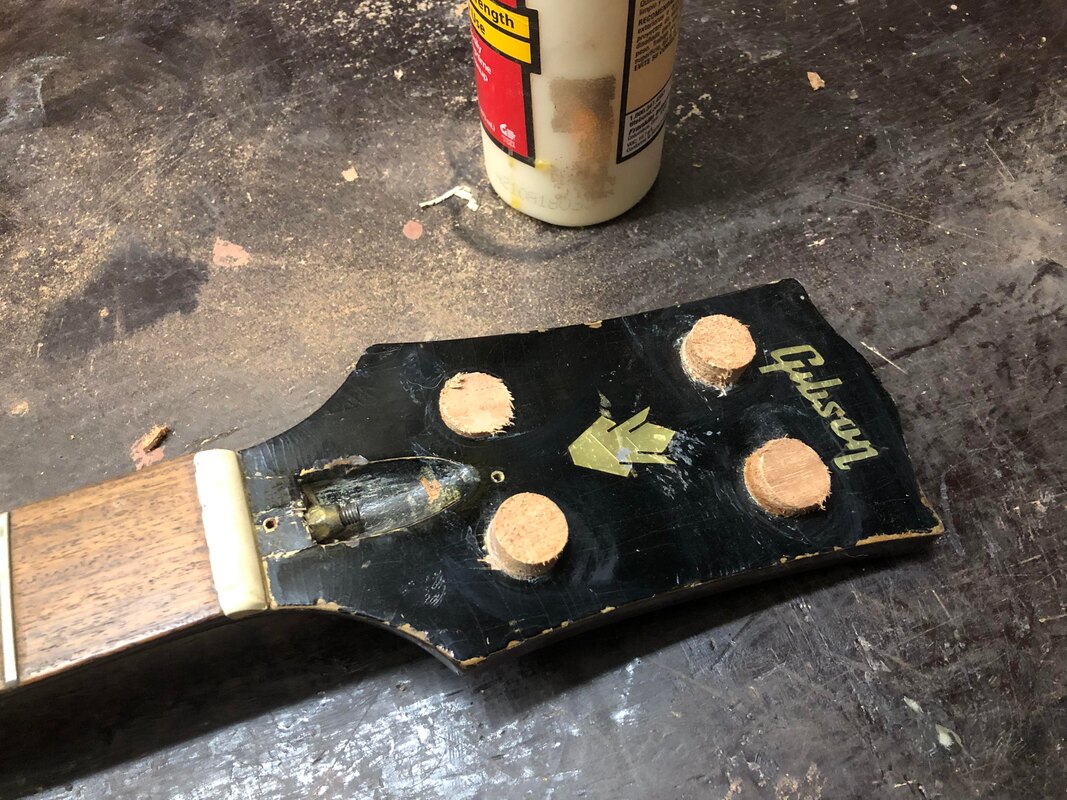
While that dried I took care of the little screw holes on that back of the headstock. Made eight little plugs and glued them in.
The sanded the back flat. You can see the neck is actually a three piece laminate. And the headstock has two wings glued to the laminate to give it the desired width.
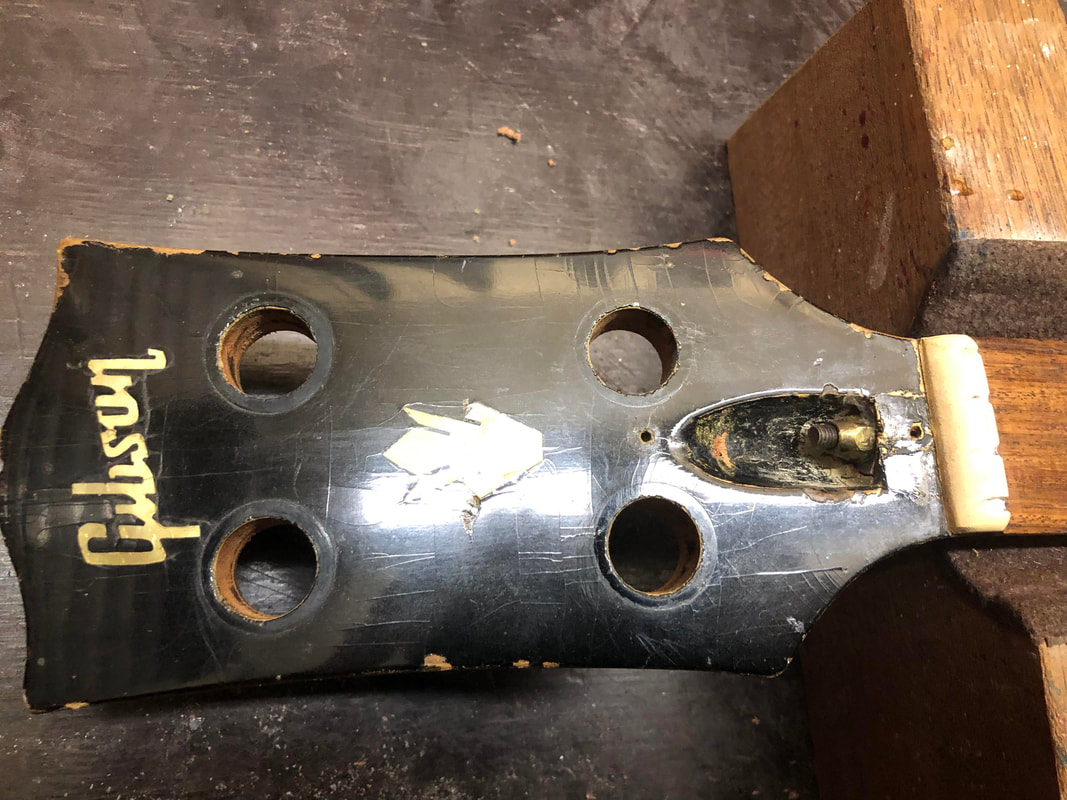
Unfortunately the scraped away -and partially filled- area of the serial number did not reveal any trace of the original number...
While that dried I took care of the little screw holes on that back of the headstock. Made eight little plugs and glued them in.
The sanded the back flat. You can see the neck is actually a three piece laminate. And the headstock has two wings glued to the laminate to give it the desired width.
Unfortunately the scraped away -and partially filled- area of the serial number did not reveal any trace of the original number...
|
|
When the back of the headstock was sanded clean of the old lacquer, I kept going and did the neck too. Carefully sanding and scraping the old lacquer off. There were a lot of dings and gauges on the neck. I didn't try to sand them out. But I tried to raise the gauges with some steam before I did the final sanding.
|
|
Sanded / scraped the neck clean. The heel needed some attention where some pieces broke off when I removed the neck. But I was going to sand a different (correct) angle anyway. So that wasn't going to be a big problem.

|

|
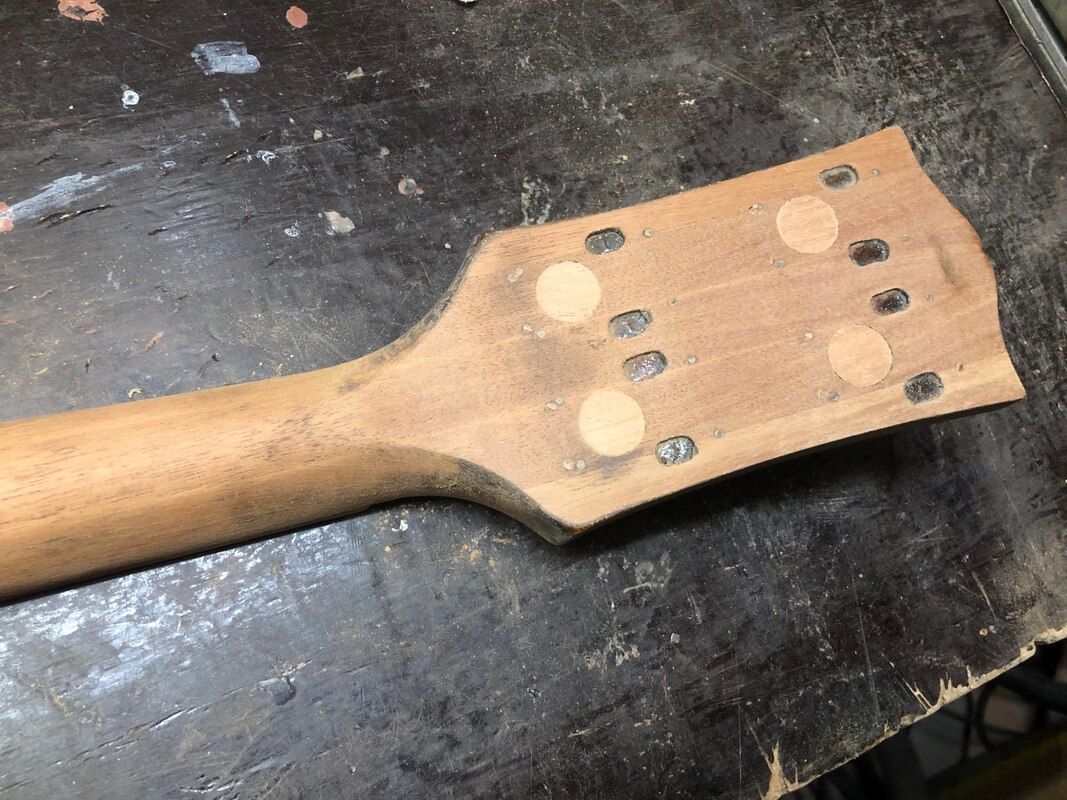
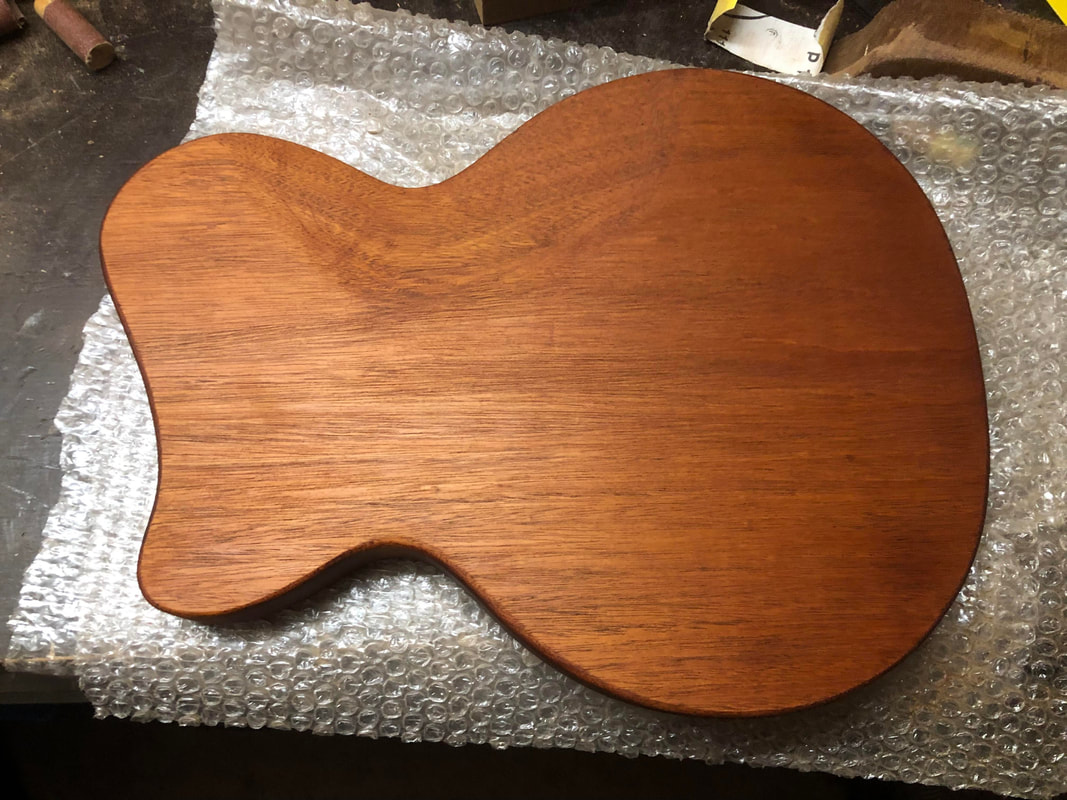
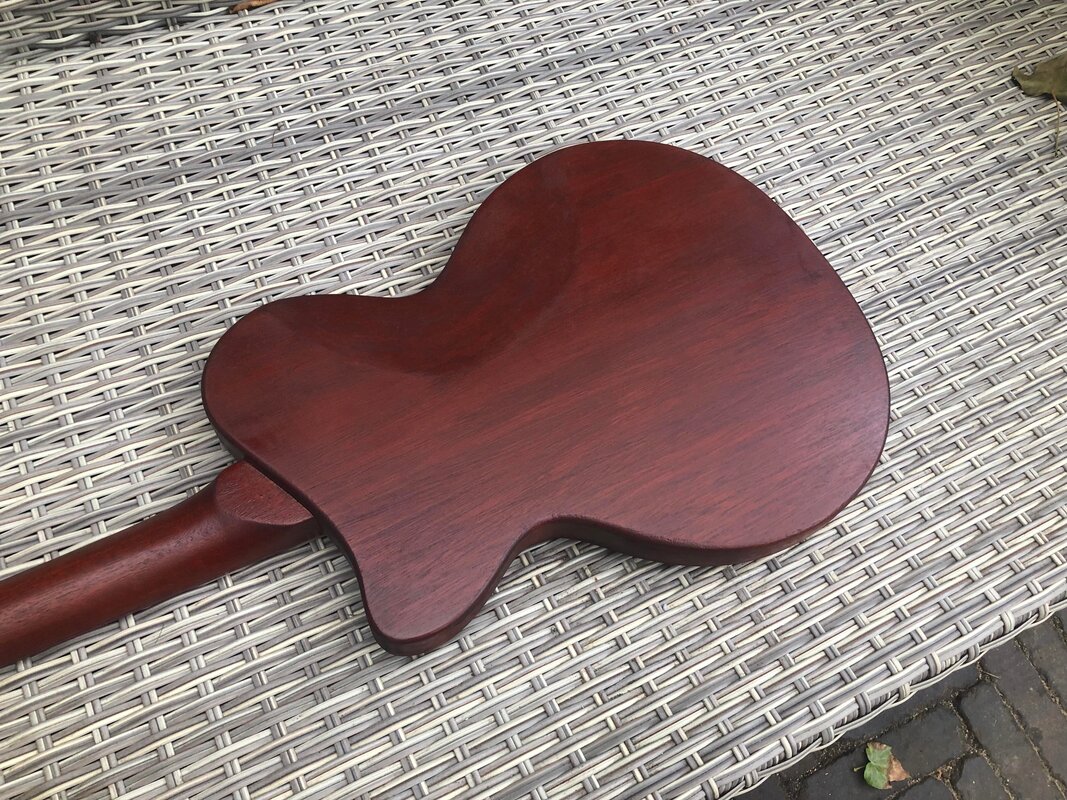
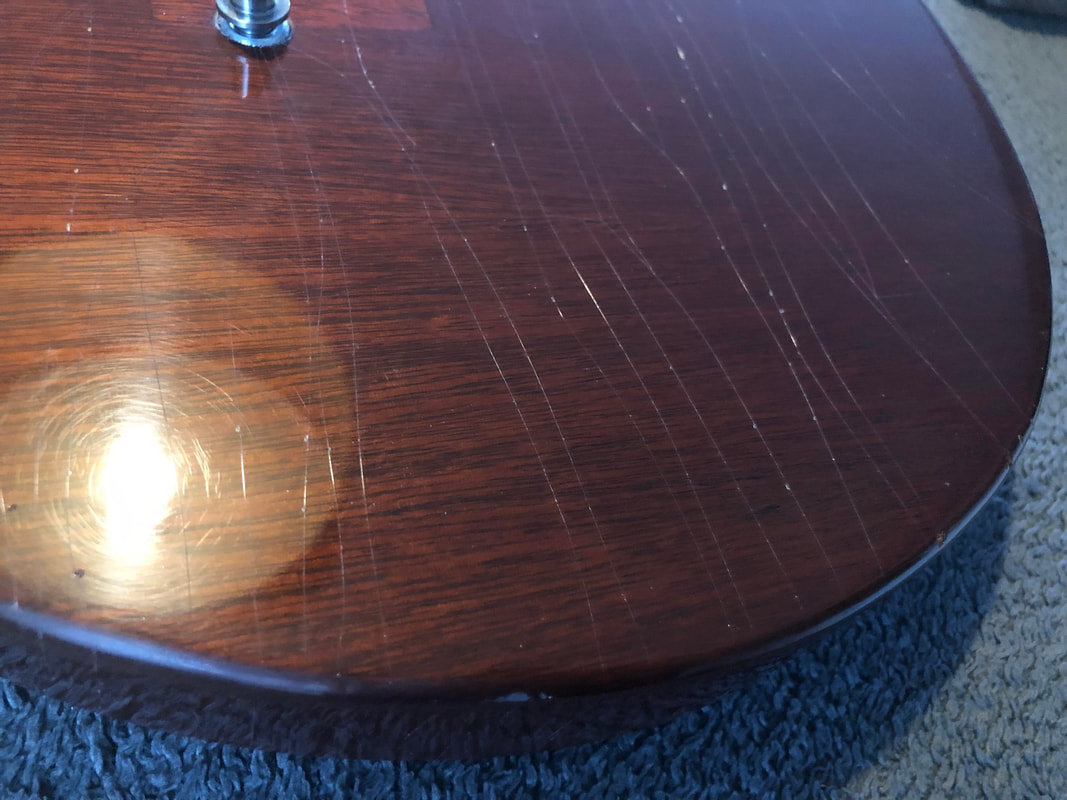
The front and back of the body sanded clean.
|

|
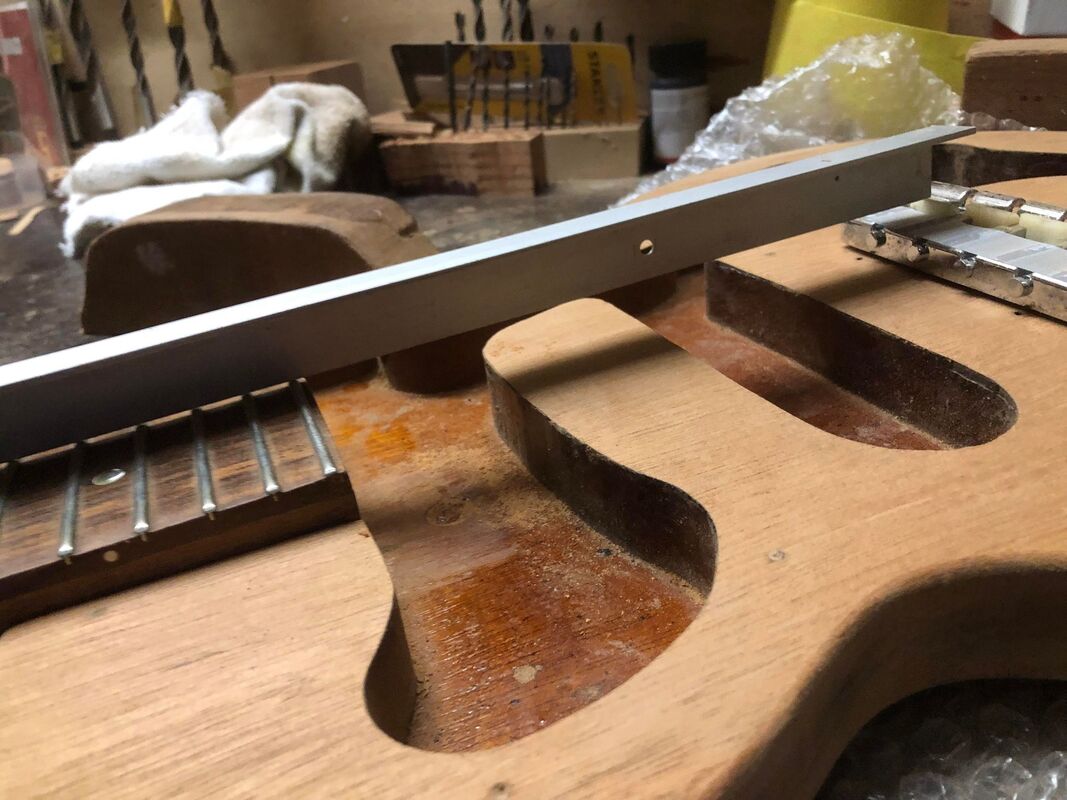
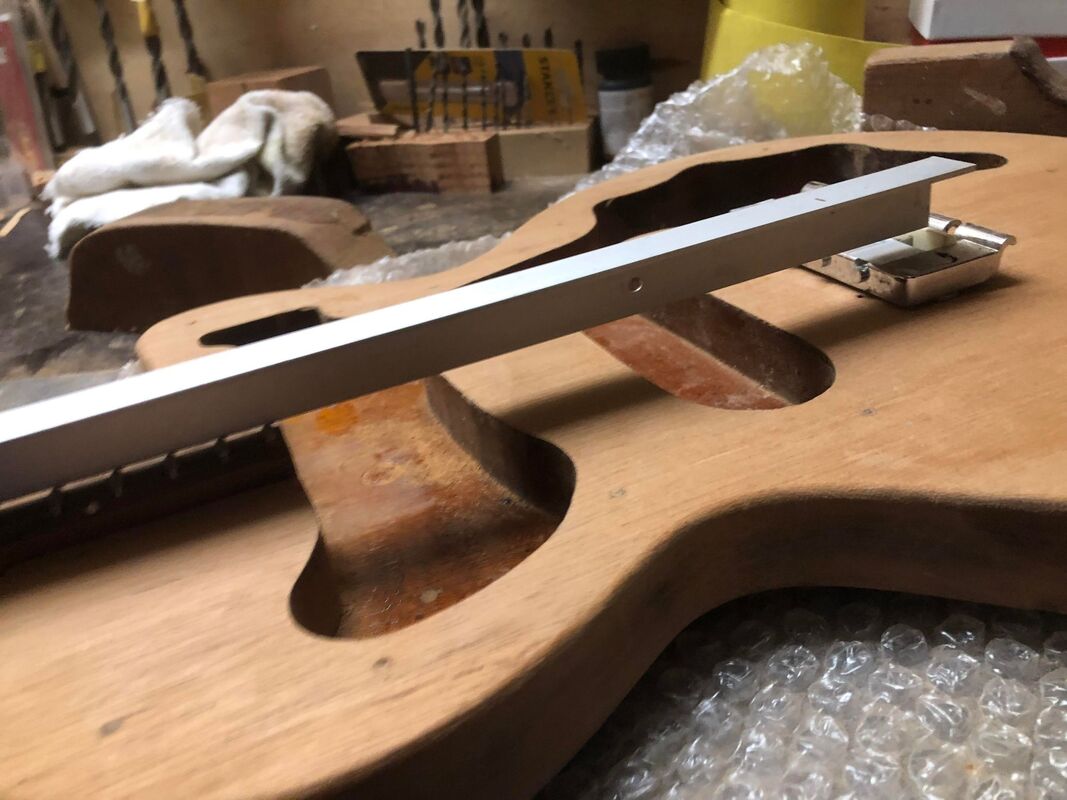
Sanded the heel to create the correct neckjoint angle. Checked it with a long ruler. With the bridge at it's lowest, the ruler just touching the saddles. Now the angle looks more like it's supposed to!
|
|
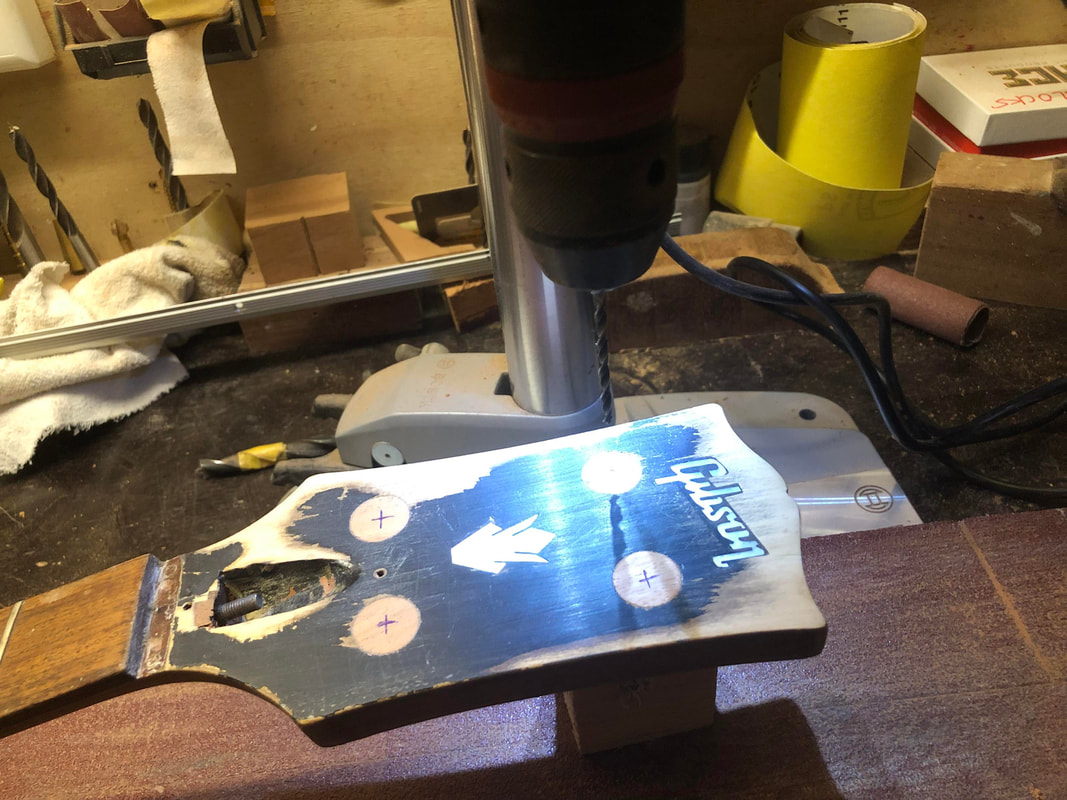
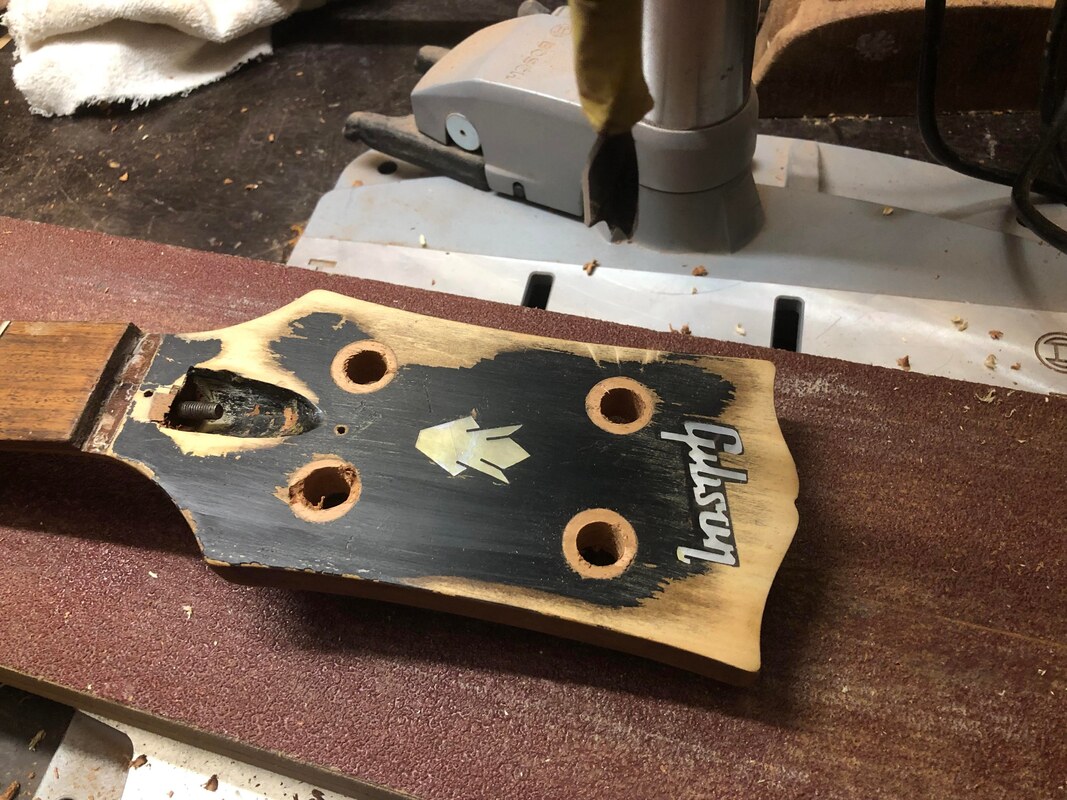
Before glueing the neck back into the body I drilled the new (smaller ) tuner holes. First marked them off, then drilled a pilot hole for the 11mm drill. Then cleaned up the hole with a Dremel to the desired 12mm.
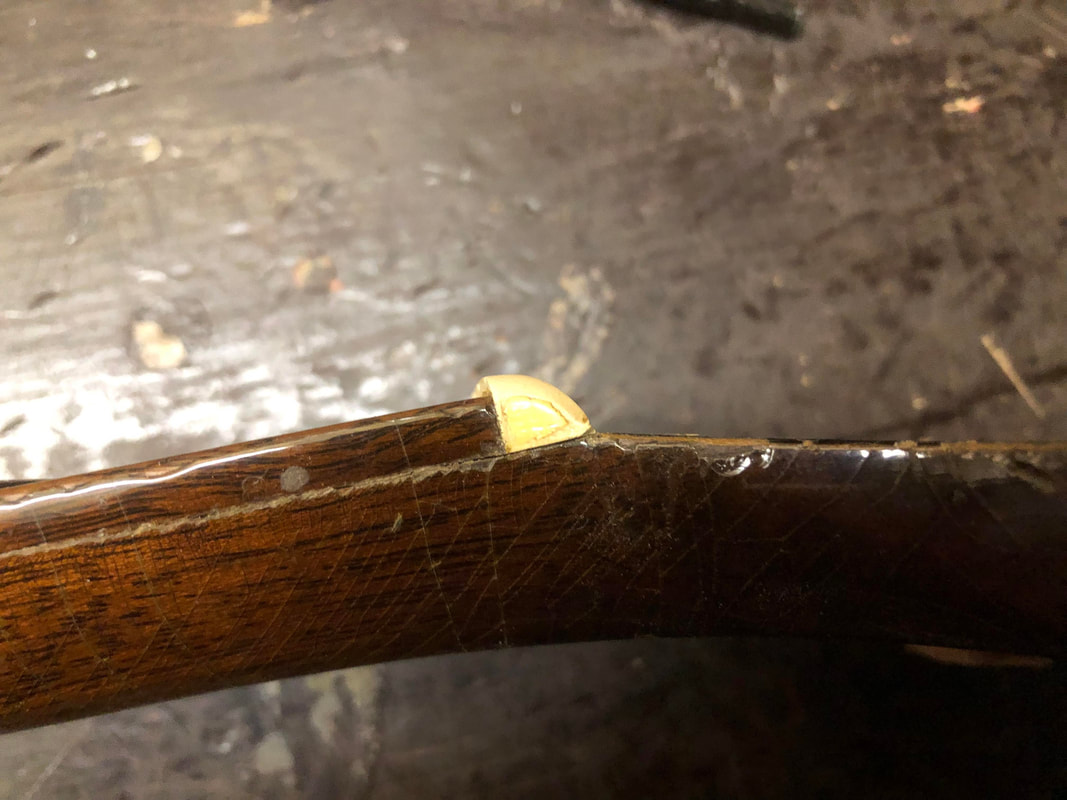
Did need to fix the tiny tear out of the drill at the G tuner.
Did need to fix the tiny tear out of the drill at the G tuner.
|
|
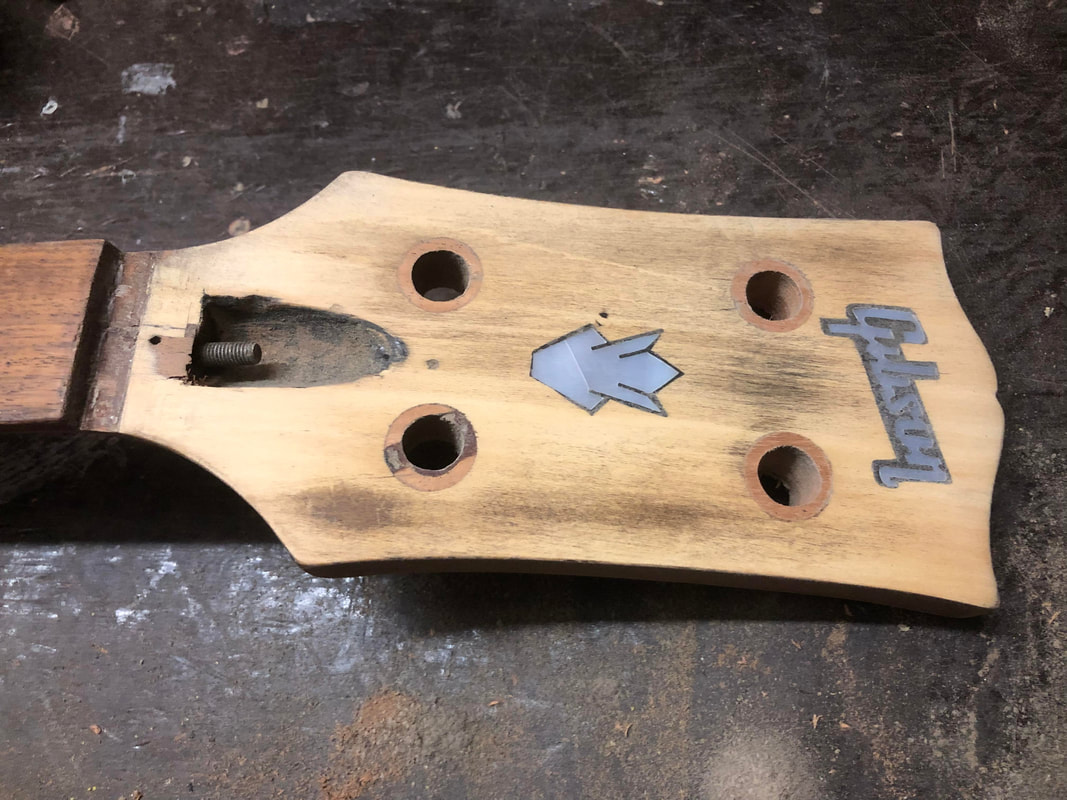
Filled up the little drill tear out at the G tuner hole. And sanded the headstock face clean. Then wiped the neck with some white spirit to reveal possible missed spots of old lacquer. Looks good. Nice natural Mahogany color!
|
|
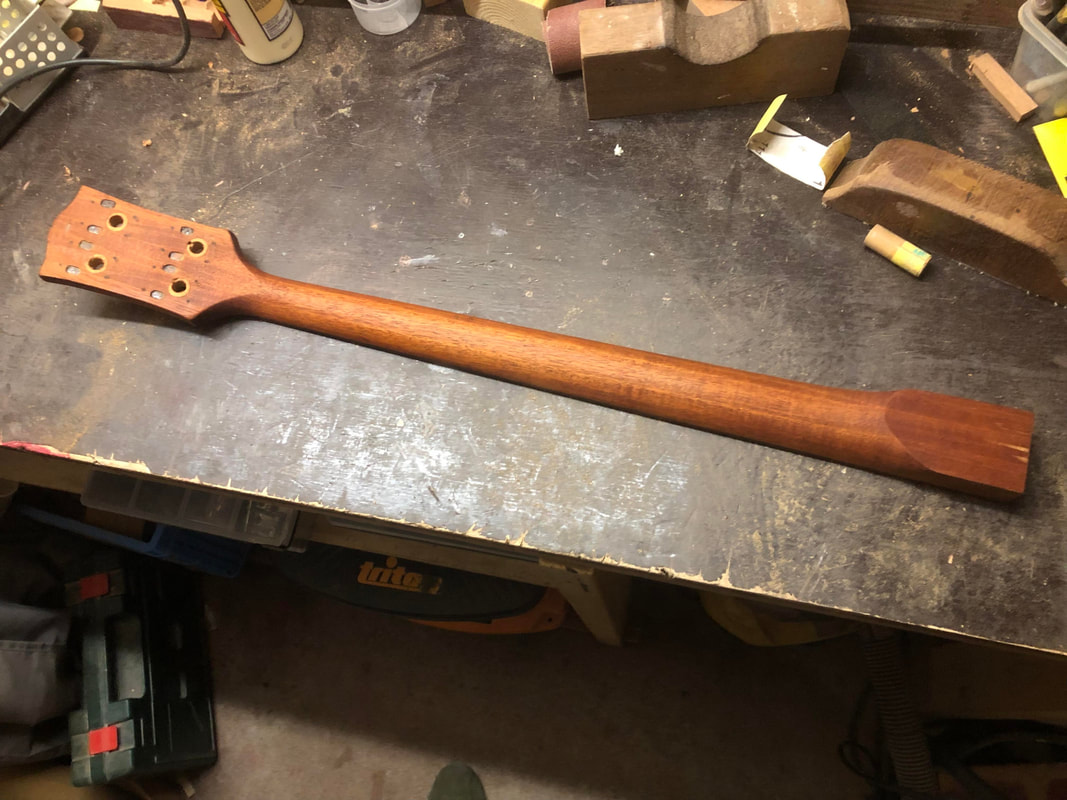
Also wiped the front and back of the body with white spirit. As you can see the back needed a final light sanding.

|
|
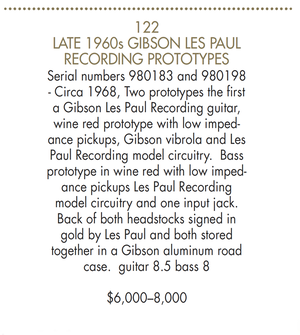
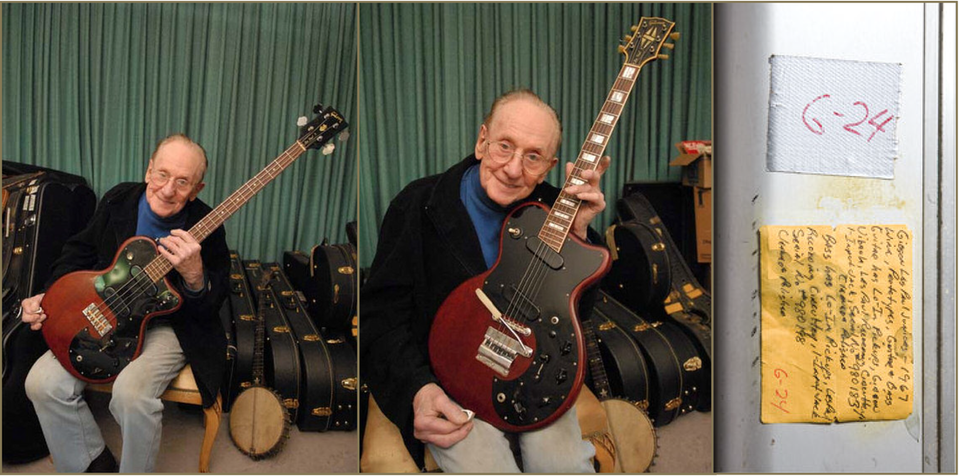
Before I could glue the neck in, I needed to address the lack of a serial number. Now -as mentioned earlier- I know of only one similar Les Paul Prototype bass. It's the one that belonged to the late Mr. Les Paul himself. It was auctioned in 2012. In the catalogue the bass is pictured together with a six-string guitar with the same body shape. The serial number of this bass was 980198. It can also be seen in the handwritten note that Les put in the case of these two instruments. (the pair was sold for $ 40.625)

|
|
|
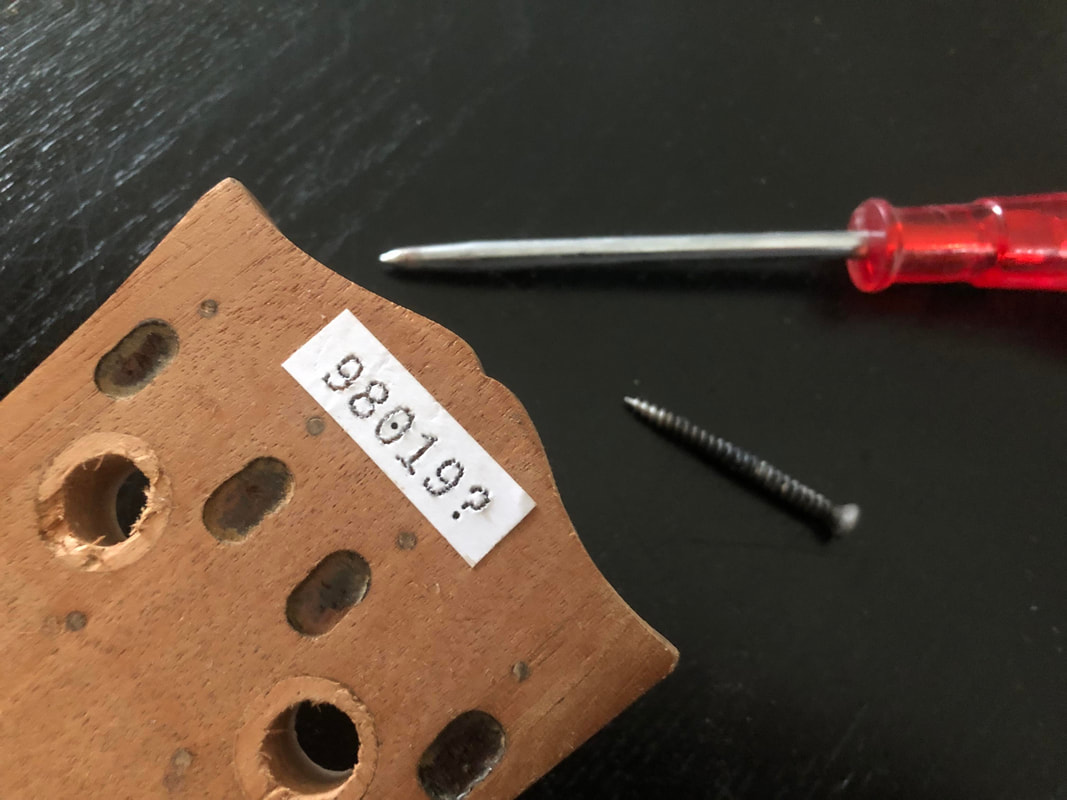
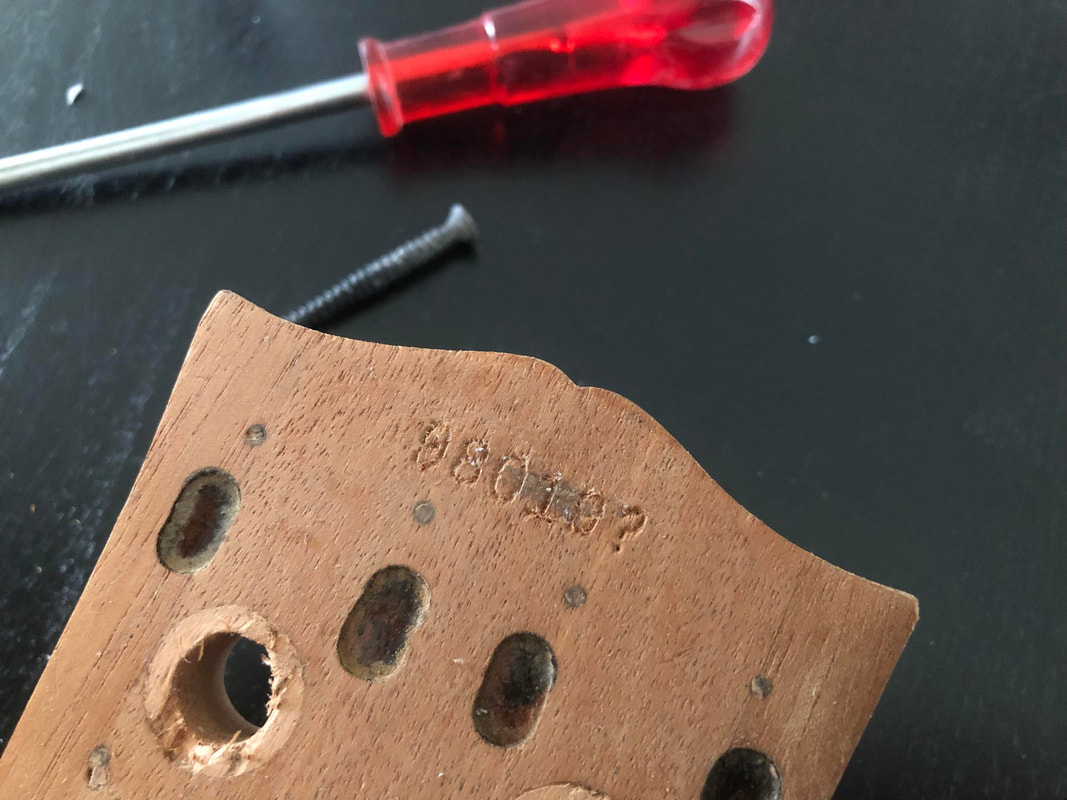
So I decided to give my bass a serial number that is very close to this one. First I thought about making it 980199. But since I don't know if mine was built before or after Les Paul's bass I opted for 98019? (a question mark instead of a 9). Seems only fair to me to make it obvious it isn't an official serial number, right?
I found a type font that is very close to the font that Gibson used for the stamped numbers. I printed it in the proper size and spacing. Glued it onto the headstock and I used the tip of a screw to "write" the serial number into the headstock.
I found a type font that is very close to the font that Gibson used for the stamped numbers. I printed it in the proper size and spacing. Glued it onto the headstock and I used the tip of a screw to "write" the serial number into the headstock.
|
|
The half moon washer in the truss rod cavity had gnawed its way into the neck. So I decided to fill up the compressed wood with some mahogany. I made a little matching "washer" of mahogany and glued it onto the original metal washer. By doing this I knew that the shape was exactly the same as the compressed part inside the cavity. Then I glued the "washer sandwich" into the exact place and used the brass nut as a clamp by tightening it (a bit).
|
|
Glued the neck back into the cleaned up pocket.
|
|
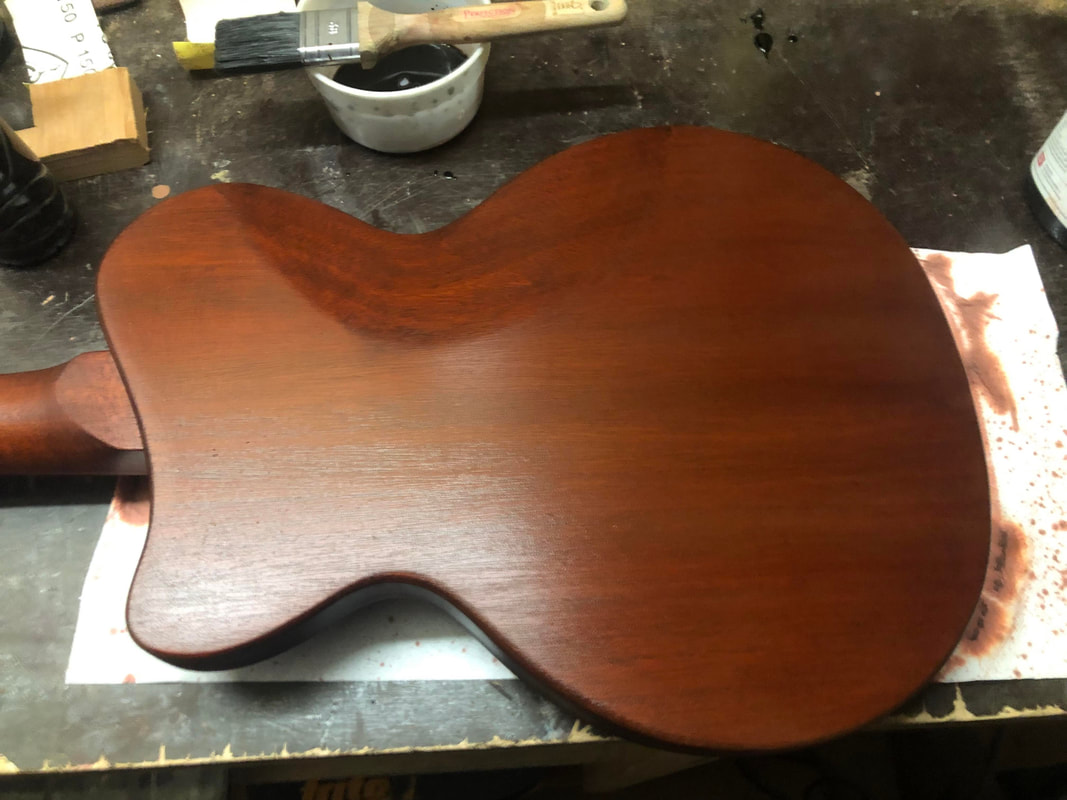
Stained the bass in the desired colour. Trying to get a colour as close to the original color as possible. But slightly more red as in the picture of mr. Les Paul holding his bass.
I started with a light mahogany stain and then gradually darkened it by adding dark mahogany to the stain and a few drops of dark walnut.
I started with a light mahogany stain and then gradually darkened it by adding dark mahogany to the stain and a few drops of dark walnut.

|
|
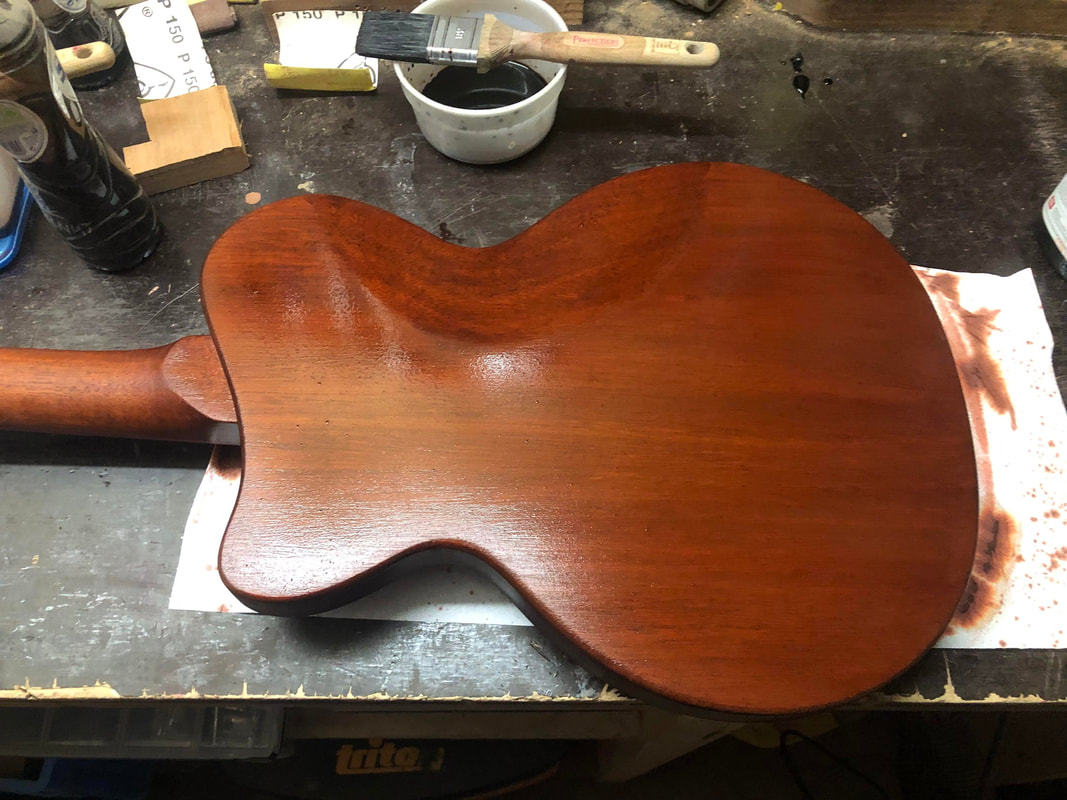
After the first layer of nitro cellulose sanding sealer.
|

|
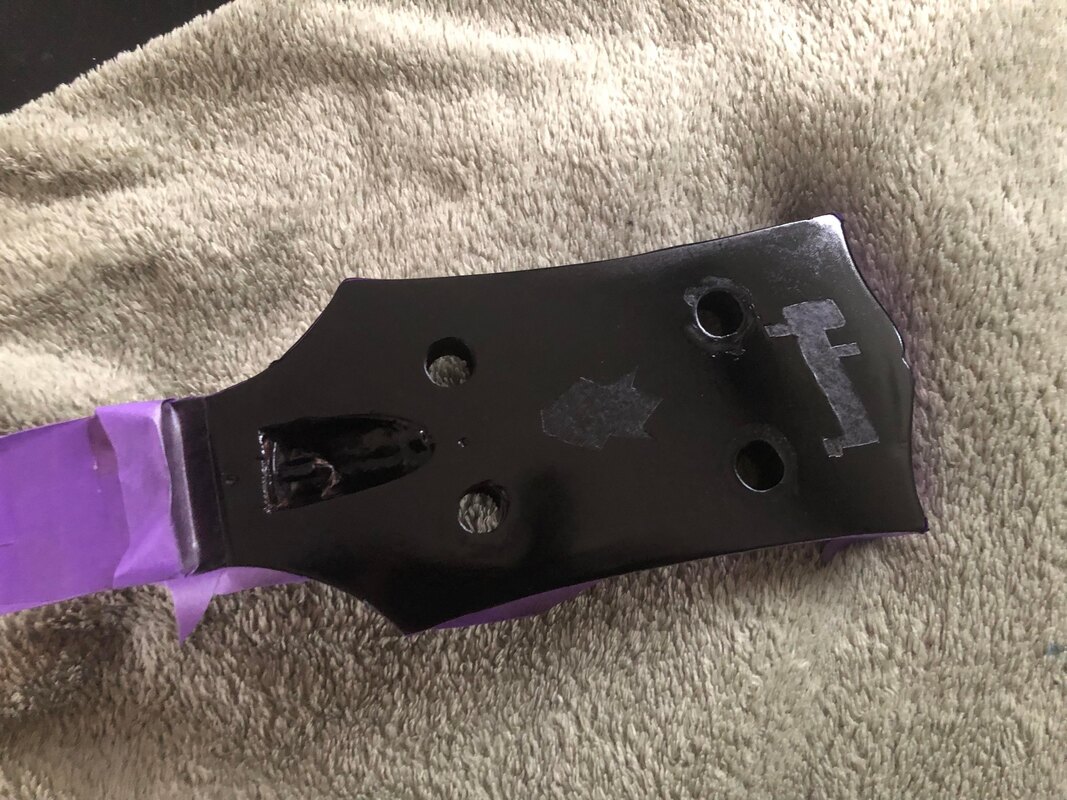
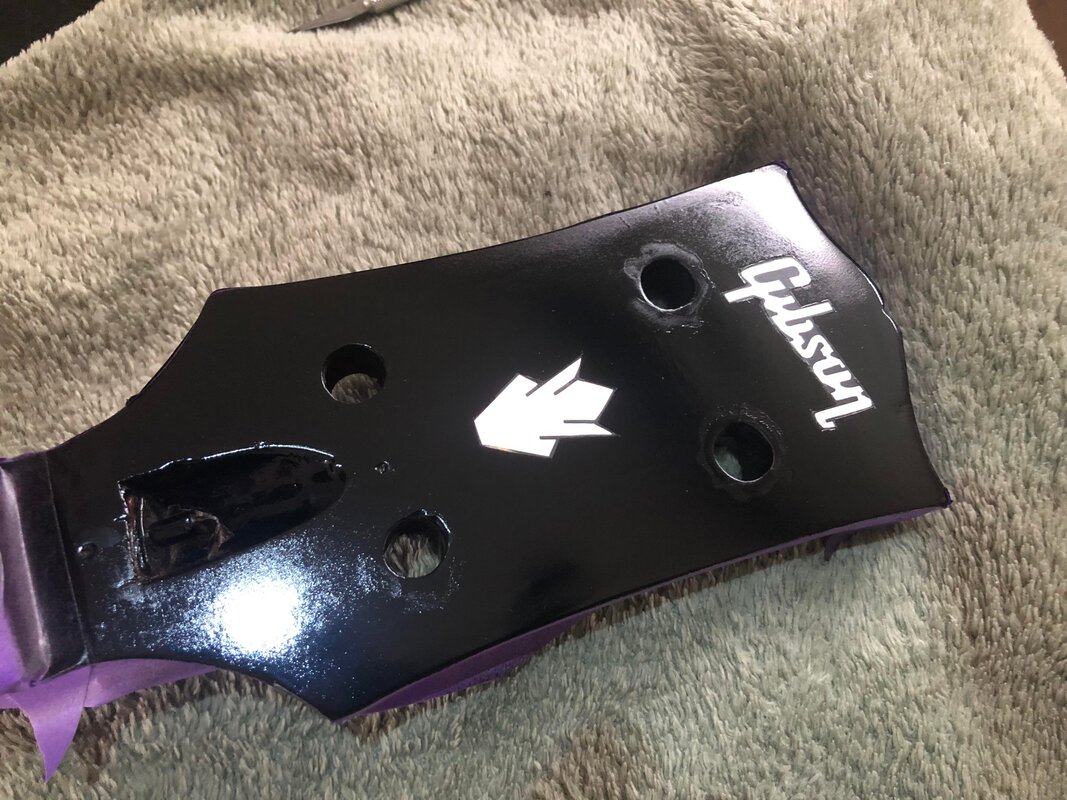
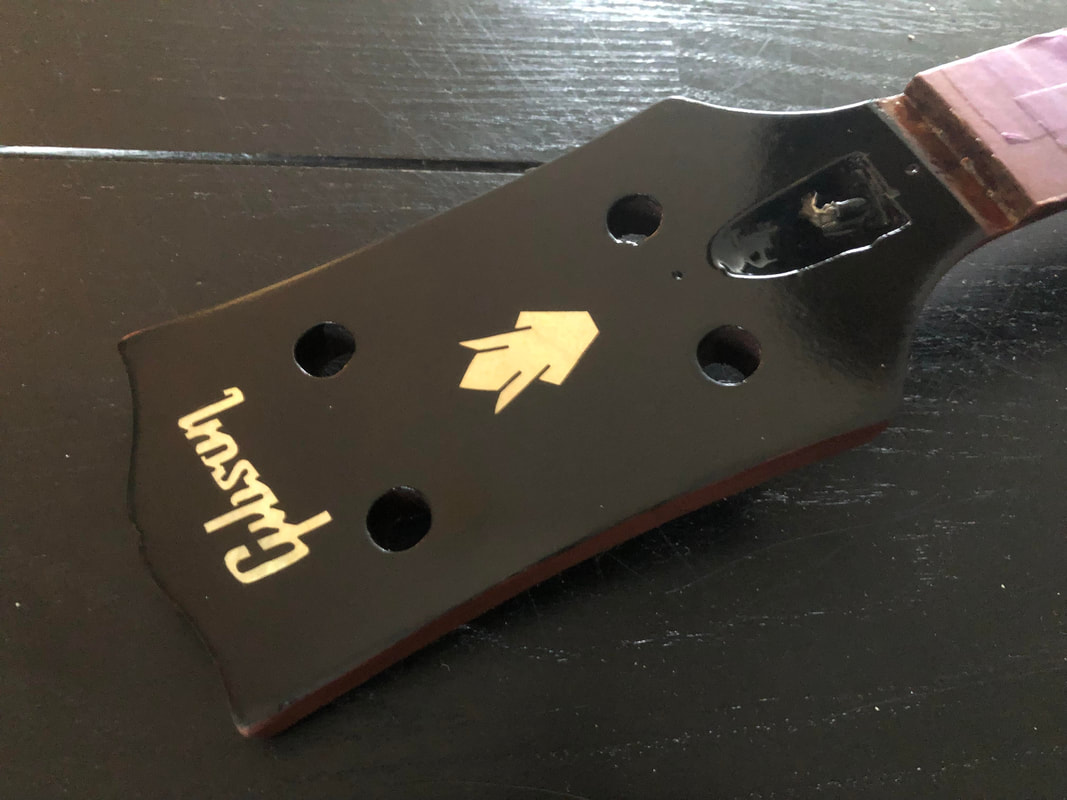
Masked off the Gibson logo and crown with low-tac masking tape. Cut it out with a scalpel blade.
Then sprayed the face plate black. And after it dried, I peeled off the masking tape.
Then sprayed the face plate black. And after it dried, I peeled off the masking tape.
|
|
|
Sprayed a thin coat of transparent yellow nitrocellulose to emulate 50+ years of yellowing by UV.
|
|
Polished the finish. And cleaned up the fretboard.

|

|
Healed the two broken off corners of the pickguard.
|
|
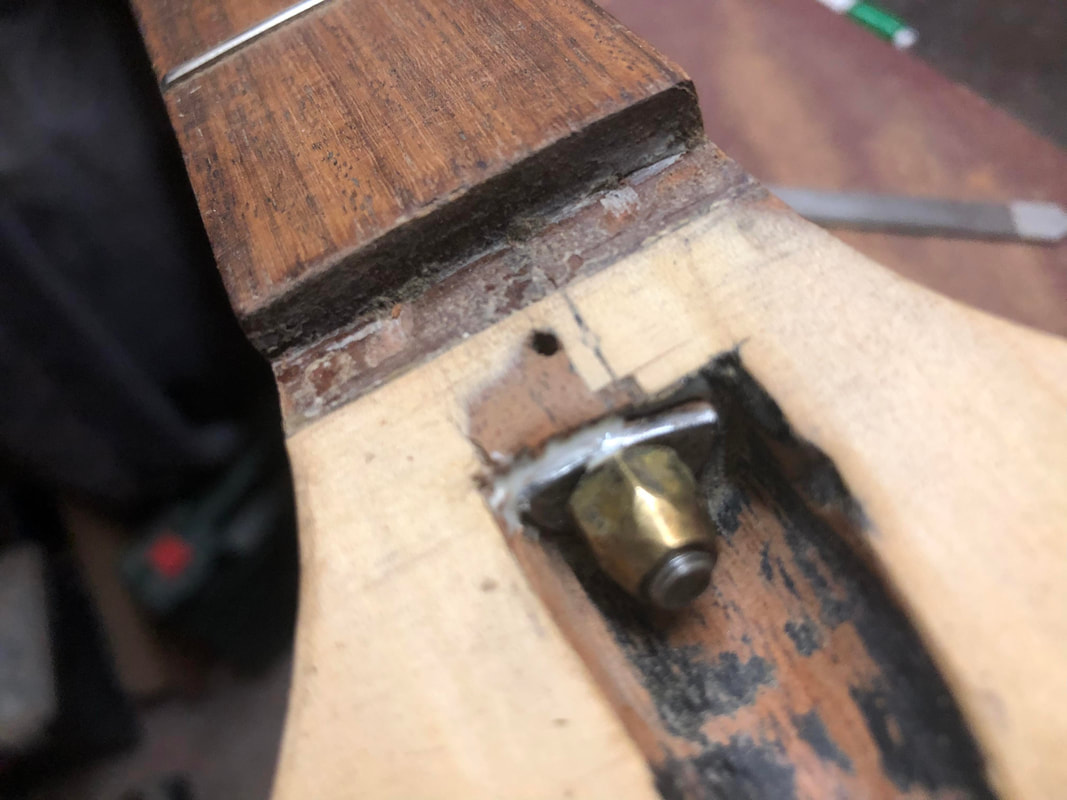
Had to desolder the ground wire to be able to put it back in at the treble side bridge post. Which wasn't a bad idea because the old soldering looked really crappy anyway (see on the left in the pic)
And re-installed the top nut. And screwed the trussrod nut back on.
And re-installed the top nut. And screwed the trussrod nut back on.

|
|
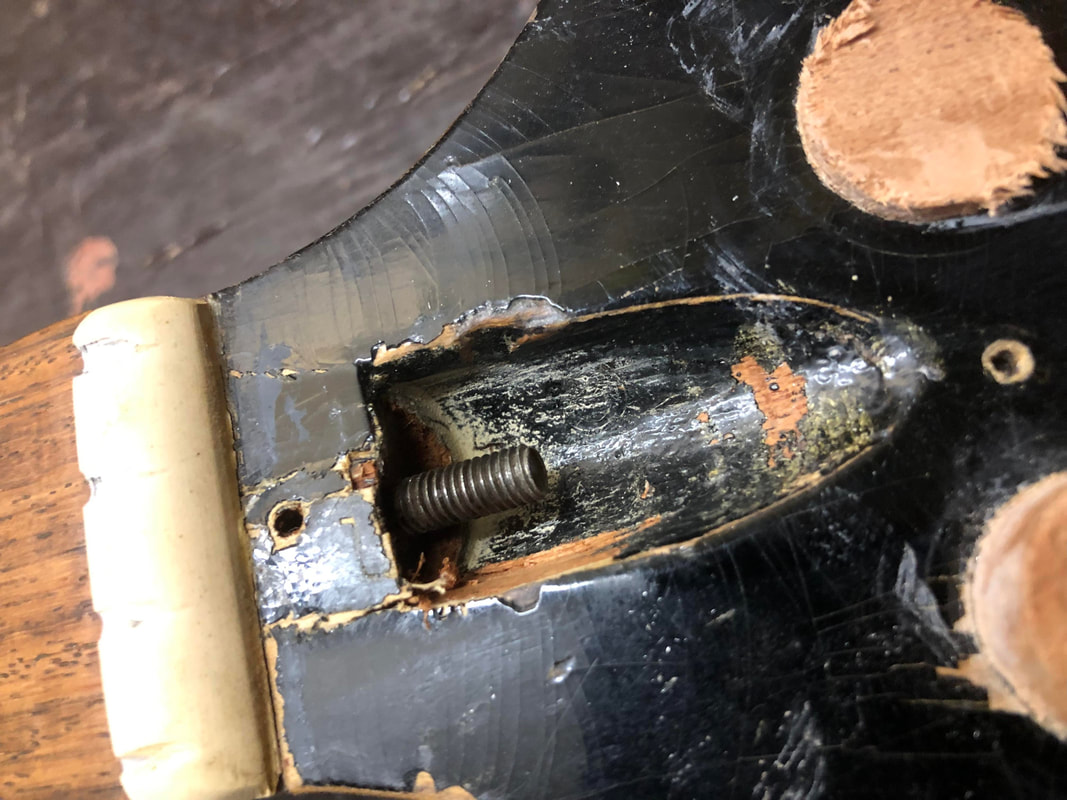
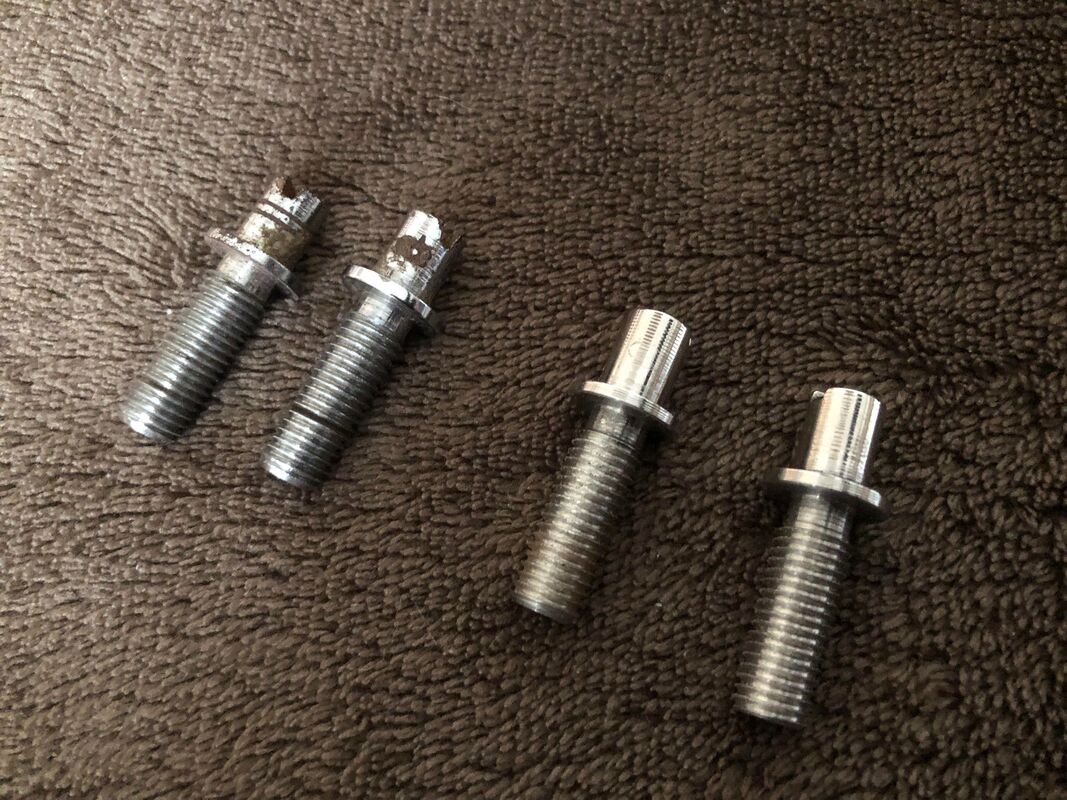
Hammered in the inserts for the bridge posts. And had new bridge posts made to replace the old rusty ones that had been damaged because the hex screws in the bridge had not been loosened before adjusting the height.
The new ones (the pair on the right) are polished stainless steel.
The new ones (the pair on the right) are polished stainless steel.
|

|
Put the bridge loosely in place (tape is to prevent the saddles from falling out while the strings are not on yet). I knew the balance of this bass wasn't ideal. Re-installing the vintage reverse wind tuners surely wasn't going to help. So I made a strip of lead along the inside of the controls cavity, to help fight the neck dive of this bass.

|

|
Since this is a bass from 1968 I decided make the finish look its age. I didn't put back all the battle scars that it had prior to the restoration. But I did create some minor damage on the sides. And an all -over craquelée-effect with a similar pattern to the hairlines that it had prior to the restoration.
|
|
I put the bridge back on and soldered the ground to the back of the pot.
Screwed the pickguard on. And installed the tuners. Put the old strings back on. She's almost ready to rock.
Screwed the pickguard on. And installed the tuners. Put the old strings back on. She's almost ready to rock.
|

|